


How to Automatically Track Submission Sources with Forms in SmartSuite
Tracking where your form submissions come from is essential for event planning, sales CRMs, and lead tracking. Without it, you won’t know whether a user accessed your form from an email, website, QR code, or social media.
Fortunately, SmartSuite’s prefilled forms make it easy to track submission sources—automatically! In this guide, we’ll walk through how to set this up, ensuring you always know where each form submission originated.
Why Track Form Submission Sources?
When you send out a form, SmartSuite tracks that a submission was made but doesn’t specify how the form was accessed. With this method, you can:
- Identify which marketing channels drive the most engagement.
- Improve your event planning strategies by knowing how attendees register.
- Streamline lead tracking in Sales CRMs.
Step-by-Step Guide to Tracking Form Sources
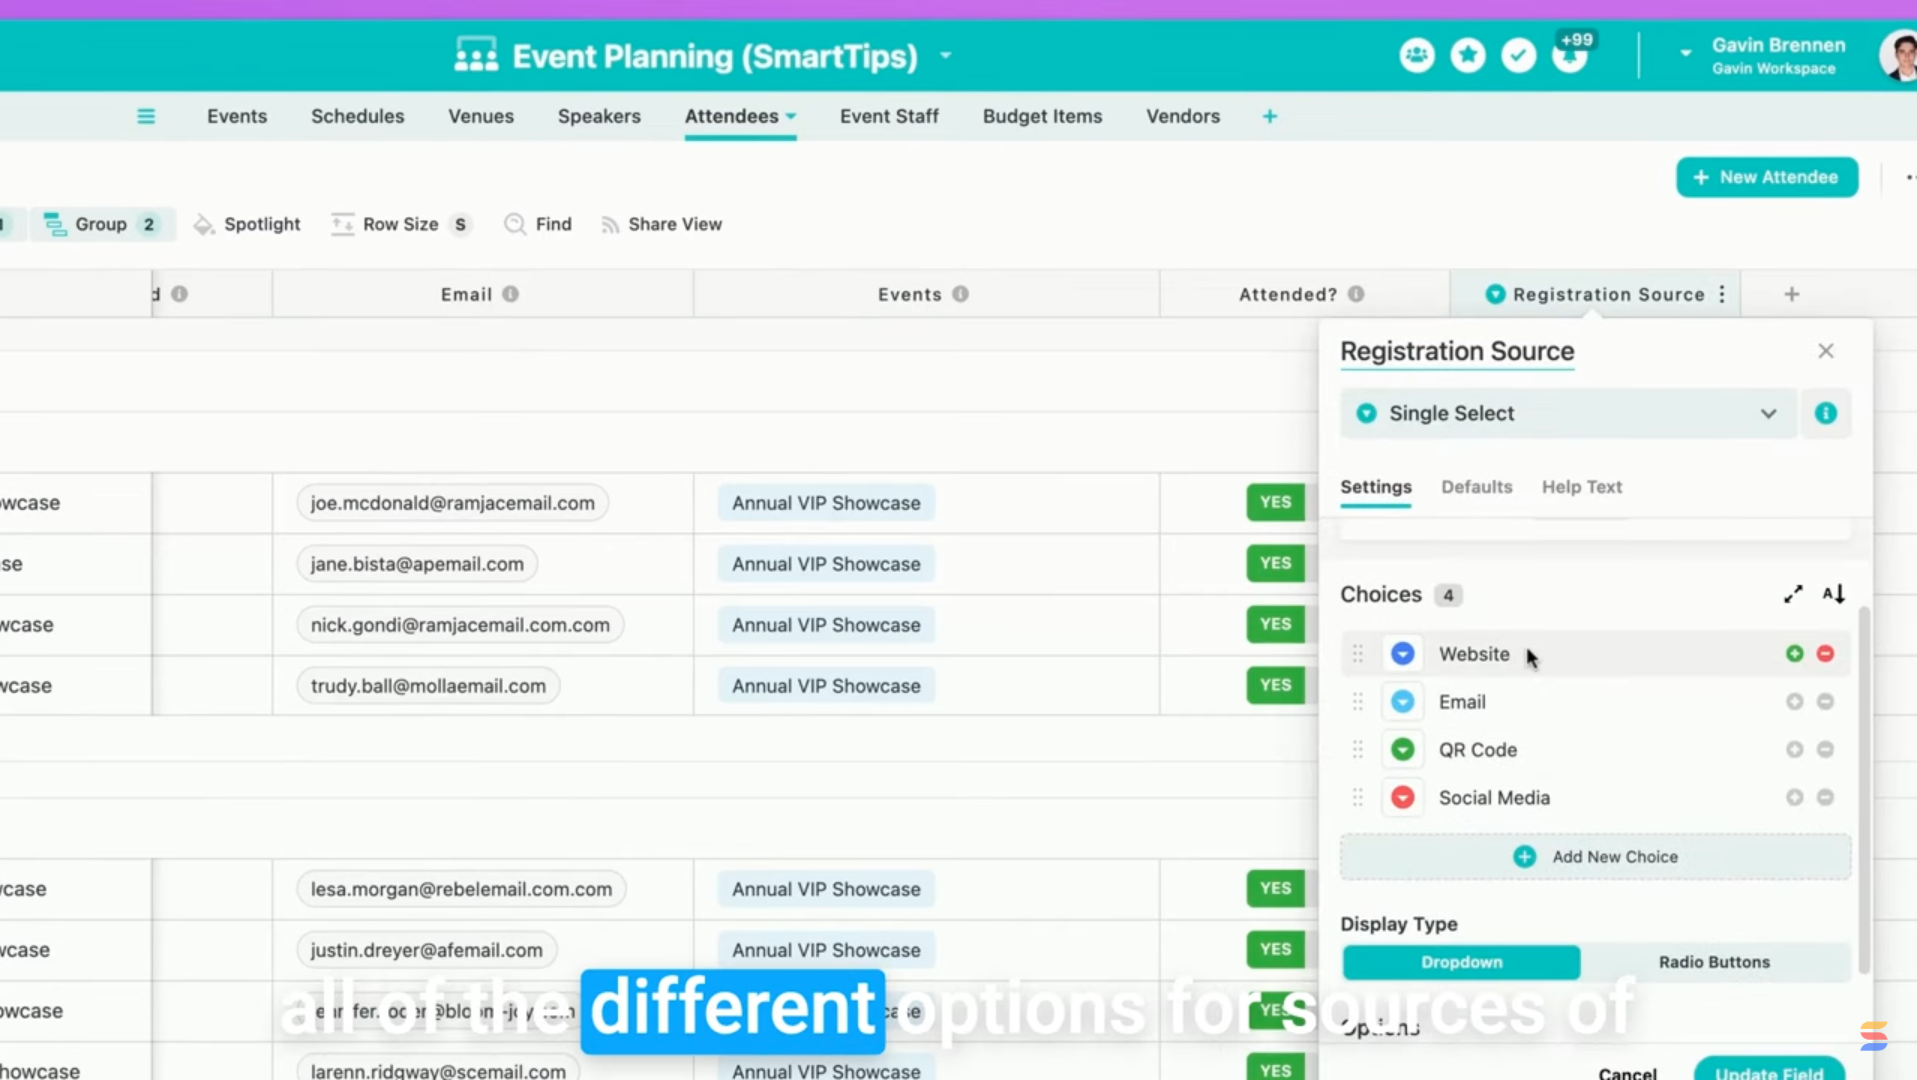
1. Add a Registration Source Field
First, you’ll need a field to store the submission source:
- Navigate to your Attendees Table (or relevant database).
- Add a Single Select field.
- Name it Registration Source.
- List all possible form sources (e.g., Website, Email, QR Code, Social Media).
2. Hide the Registration Source Field in the Form
Since we don’t want users selecting their own registration source, we’ll hide this field:
Now, the field remains in the form but is invisible to users.
3. Use a Prefilled Form URL
Now, let’s ensure SmartSuite automatically fills in the Registration Source field based on how users access the form.
How to Modify the Form URL:
- Get your SmartSuite form link (via the Share View option).
- Append ?Prefill_Registration+Source= followed by the source name.
For example:
- Website Link:
https://yourform.com?Prefill_Registration+Source=Website - Email Link:
https://yourform.com?Prefill_Registration+Source=Email - QR Code Link:
https://yourform.com?Prefill_Registration+Source=QR+Code
Important: Ensure Prefill_ is capitalized, and replaces spaces with the + in the field names.
4. Test the Prefilled Form
To verify that the tracking works:
- Copy your modified URL into a browser.
- Check if the Registration Source field is prefilled correctly.
- Submit the form.
- In SmartSuite, confirm that the Registration Source is recorded in the new submission.

Real-World Applications
This technique isn’t just for event registration! You can also use it to:
- Track lead sources in Sales CRMs.
- Monitor survey responses by distribution channel.
- Evaluate marketing campaign effectiveness.
Final Thoughts
By using SmartSuite’s prefilled form feature, you gain valuable insights into where your submissions come from—without extra coding or formulas!
Try this out in your own solutions, and let us know in the comments how you’re using prefilled forms. Got other creative use cases? Share them below!
Until next time, keep on enjoying SmartSuite! 🚀
SmartSuite provides work platform for standardizing workflows in the following areas:
- Governance, Risk & Compliance
- IT & Service Ops
- Project / Portfolio Management
- Business Operations


