One of the popular uses for no-code tools is being able to track the people who are a part of your membership. You can easily look in and see who has an active membership, when the last payment was made, and how things are going overall. Imagine building a dashboard to see the top level of how things are in your membership business.
Setting Up SmartSuite for Membership Tracking
Without further ado, let's hop into my screen and take a look at the next stages.
Tables in SmartSuite
The number one thing is to have two very specific tables for membership tracking:
- Members: All member details are listed here.
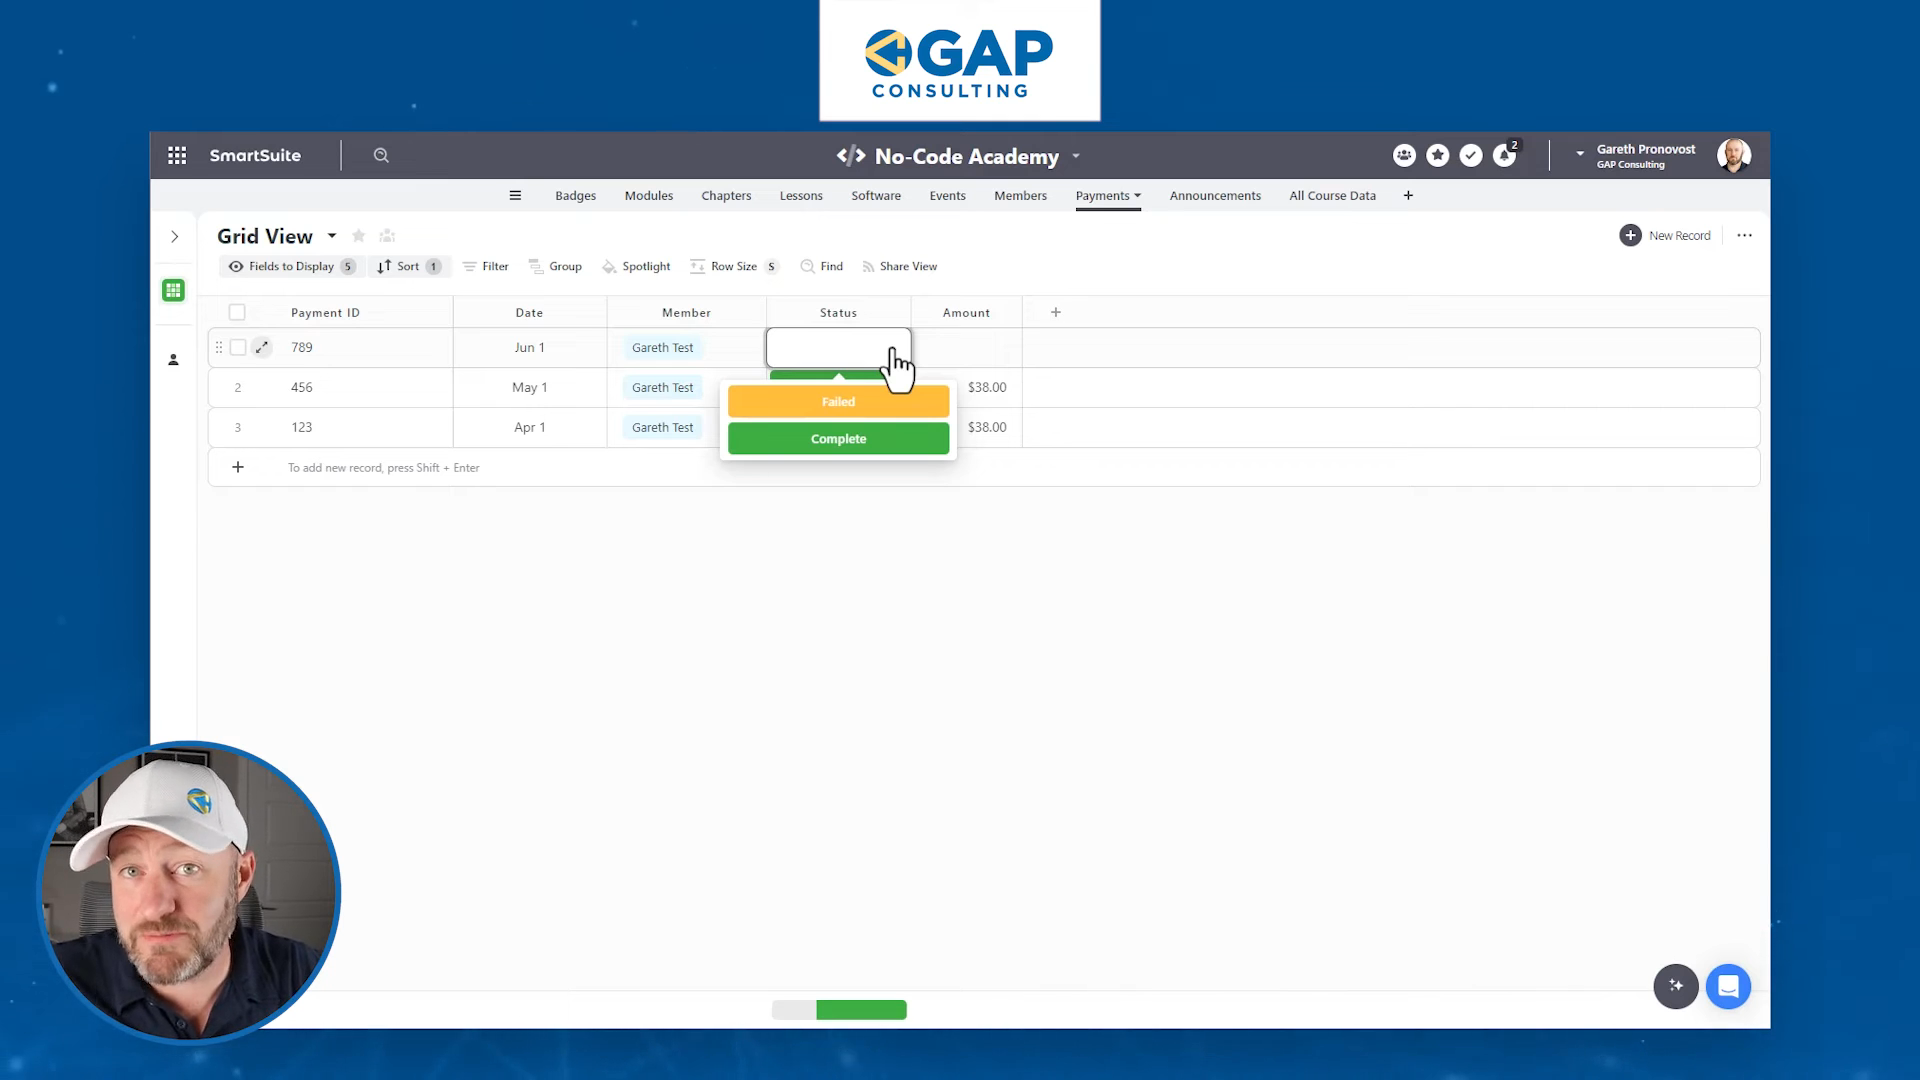
- Payments: This table links to the Members table and tracks the success of different payment attempts.
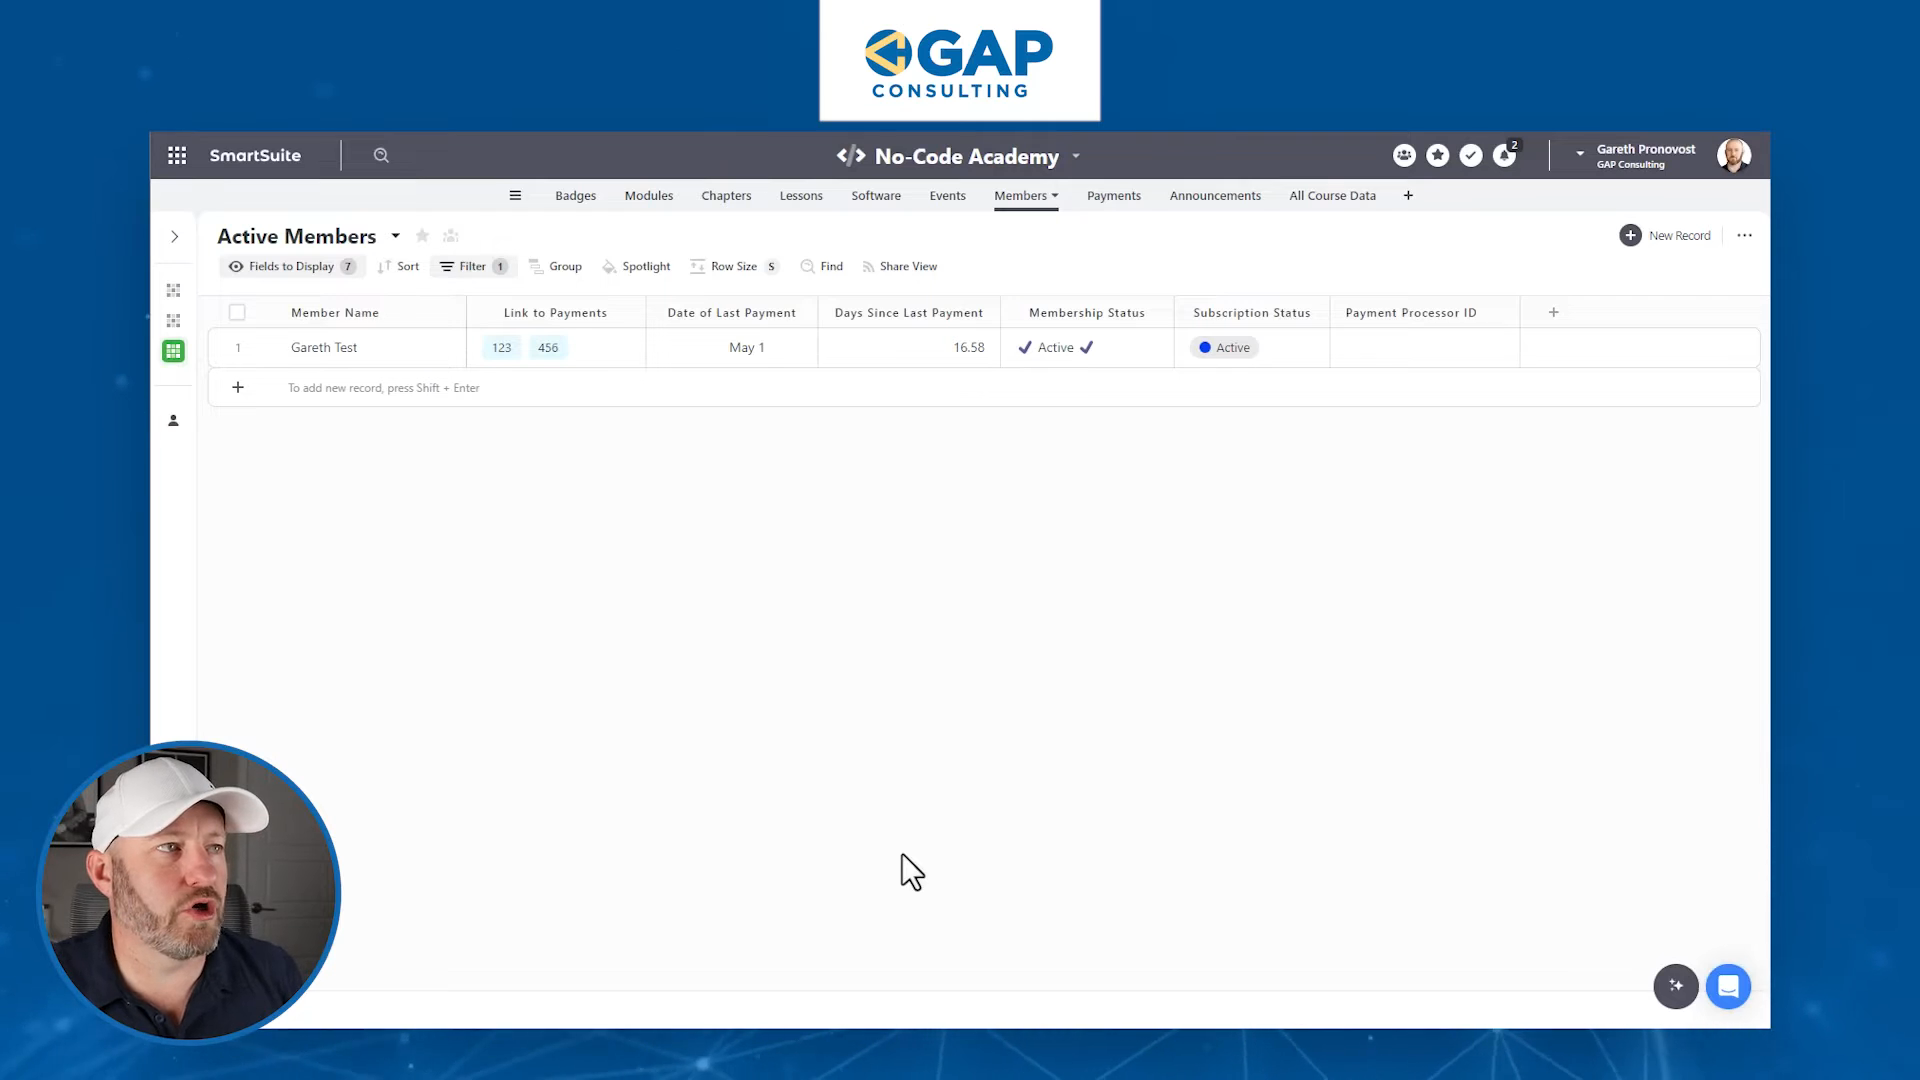
Members Table
In the Members table, you'll want to bring in the following information at a minimum:
- Member Name: Added to the record title.
- Email Field: Essential for member identification.

Adding Fields
If you don't have an email field already, add one by creating a new field.
Here's how to do it:
1. Click on "Add New Field".
2. Select "Email" from the dropdown options.3. Name the field and save it.
Payments Table
In the Payments table, we want to include:
- Payment ID: Every processed payment gives an ID or tag. Store this in your database for future lookup.
- Date of Payment: Track when the payment was processed.
- Link to Member: Identify the member who made the payment.
- Payment Processor ID: Every customer object in a payment processor has a unique ID.

Setting Up Automation
Automation plays a crucial role in this setup. When a customer is created in your payment processor (e.g., Stripe), make sure this ID is plugged back into your SmartSuite system.
Example of Automation Setup
1. Create a new automation workflow.
2. Set trigger: "New Customer Created"
3. Action: "Record Customer ID in SmartSuite"
4. Map fields: Ensure the ID from the payment processor matches the customer record in SmartSuite.
Processing Payments
Let's say it's the 1st of June, and it’s time to process the next payment. Your payment system will process or attempt to process the payment. This action will trigger another automation that associates the payment with the correct customer in SmartSuite.
Identifying the Customer
The unique customer ID is utilized to ensure the correct association. Even if the email or name changes, the ID remains constant, guaranteeing accuracy.
Payment Status Updates
Construct an automation that checks the status of each transaction:
- Failed Transaction
- Completed Transaction

Calculating Last Payment Date
Create a formula in the Members table to track the last successful payment date:
Formula for Last Payment Date in SmartSuite:
1. Open formulas editor.
2. Use "Date Difference" to compare the latest payment date and the current date.
3. Format to display the number of days since the last payment.

Example Scenario
Imagine updating the last payment date from June 1 to May 1. The formulas should automatically recalculate the membership status accordingly, determining if the member remains active or inactive.
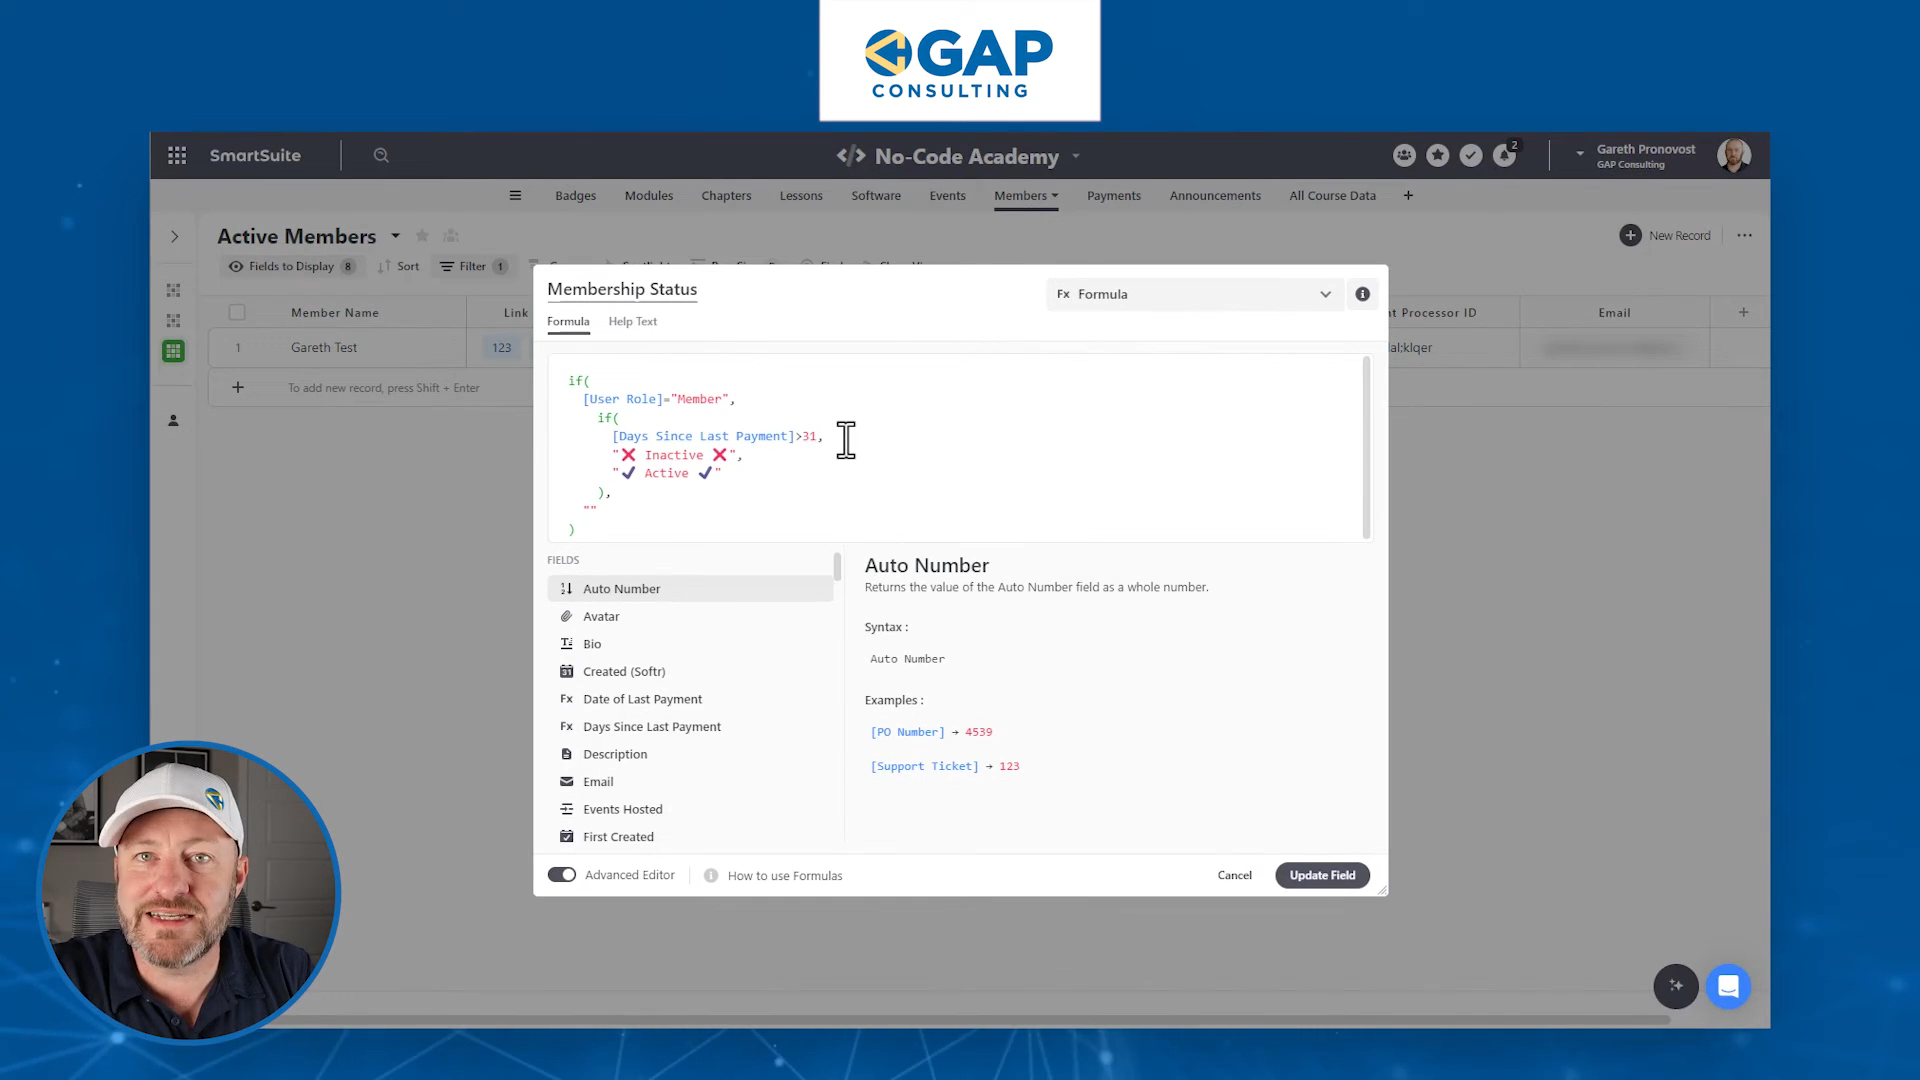
Membership Status
The membership status is essential for managing access to your services:
- Active: If a payment was made in the last 31 days.
- Inactive: No payment in the last 31 days.
Determine Membership Status
1. Create a status field.
2. Apply a formula: "If days since last payment > 31, then Inactive, else Active".

Mark Members Active/Inactive
Allow members to self-manage their status via a portal:
- Self Deactivate: Members can choose to halt their membership.
- Automation: Build workflows to manage the subscription status based on the member's choice.
Conclusion
Running a membership site using no-code tools offers endless possibilities. Whether it’s tracking payments, identifying members, or maintaining membership statuses, SmartSuite simplifies the entire process.
To experience the future of work management firsthand, start your free SmartSuite trial today!


.jpg)


