Welcome to another insightful read on unraveling the intricacies of SmartSuite Dashboards. In this blog post, we'll delve into how user permissions are ingeniously inherited within SmartSuite dashboards. Through this understanding, you'll be able to tailor dashboard experiences for diverse users within your organization.
Introduction to SmartSuite Dashboards
SmartSuite has emerged as a vital player in the no-code arena, providing powerful tools to simplify and automate workflows. A key feature that sets it apart is its innovative dashboards, which inherit user permissions seamlessly, providing customized views and interactions for each user.
Let's walk through how these dashboards are structured, specifically around how user permissions are set up and managed within the workspace.
Understanding User Permissions
User permissions in SmartSuite ensure that every individual in the organization has access strictly aligned with their roles. This nuanced control makes SmartSuite a secure, user-friendly platform as your team collaborates on various projects.

Inheritance of Permissions
The permissions in SmartSuite dashboards are inherited based on the user's role within the team or organization. Permissions include viewing, editing, and creating records, and are organized into solutions and specific tables within those solutions.
Creating Service Order Templates
To begin, using a service order template exemplifies how easy it is to set up and customize your workspace.
- Accessing Templates: Log in to your SmartSuite account and navigate to the Template Gallery.
- Searching Templates: Type "Service Orders", and choose to use this template within your workspace.
This installation provides you with a pre-configured solution, complete with tables like Jobs, Services, and Team, ready for customization.
Organizing with Folders and View Permissions
Keeping a well-organized workspace is essential for collaboration, and SmartSuite's folder system is key:
Creating Folders
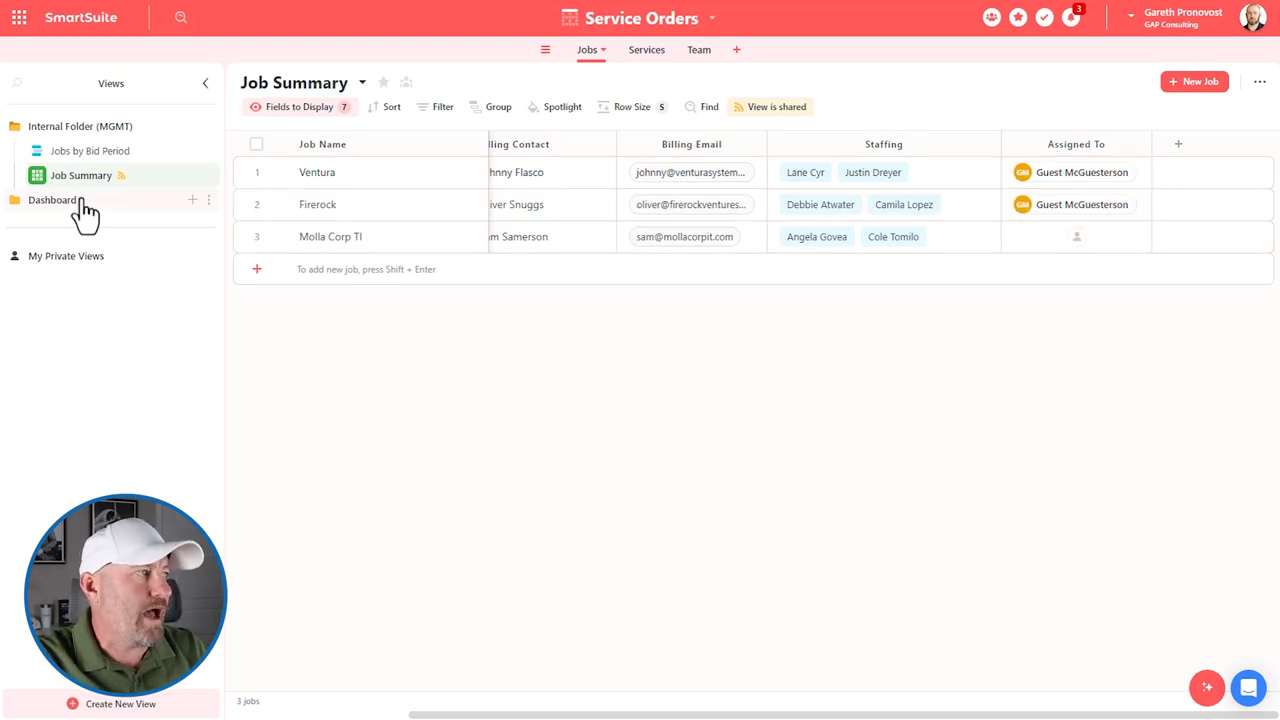
- Internal Folder: Use this for management-level views or sensitive data.
- Dashboard Folder: This folder will host the dashboard views, ensuring easy access management.
Setting Permissions
Folders allow you to set view-specific permissions:
- Internal Use: Restrict access to management or admin roles.
- Team Access: Open view access within selected folders, ensuring individuals only see data relevant to their roles.

Building a Custom Dashboard
Now let's create a dashboard customized to the specifics of your team's projects.
Steps to Build:
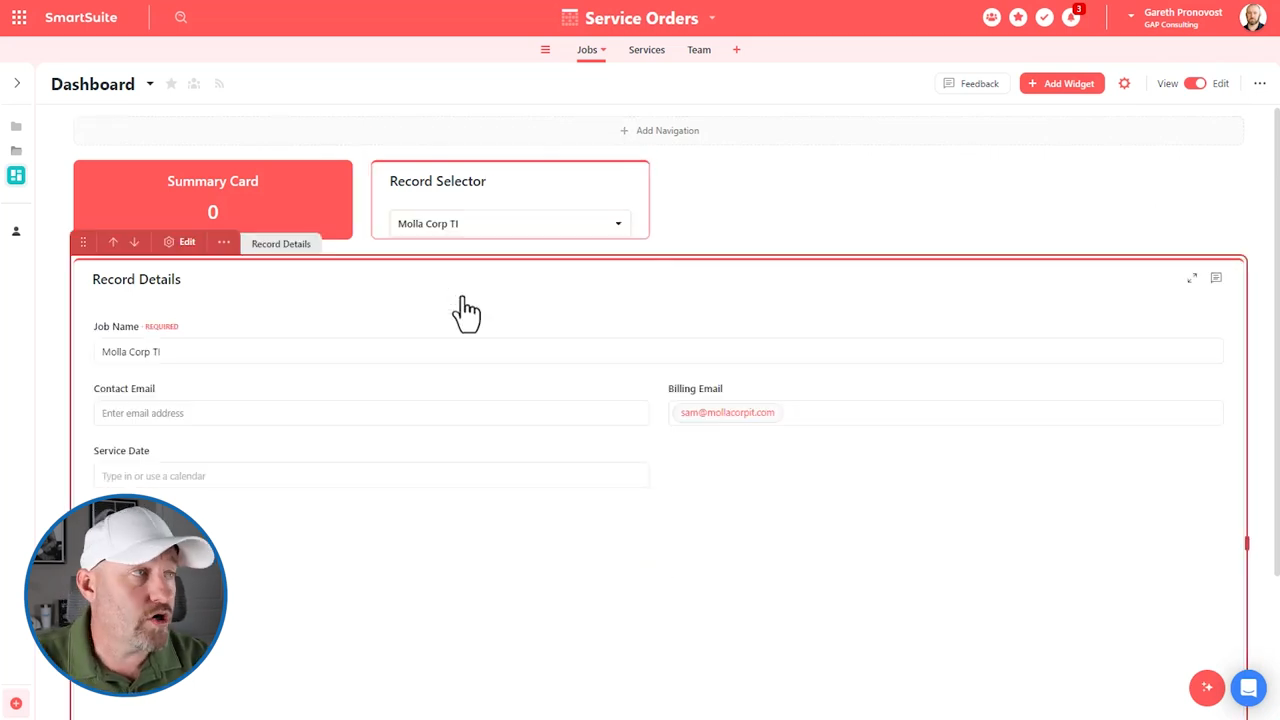
- Add a Dashboard View: Within the Jobs table, add a new dashboard.
- Customize with Widgets: Add widgets such as summary blocks or record details to bring the necessary information to the forefront.

Practical Tips for Widgets
Use filters to ensure that users only see data of relevance to them. For example, configuring a summary card to display records assigned to the current user only.
Assigning Jobs to Team Members
A critical aspect of managing dashboards is ensuring that job assignments are clear.
Assigning Using Fields
The "Assigned to" field is pivotal:
- Ensures individuals only access data pertinent to their role.
- Simplifies the visibility of tasks across teams.
Onboarding and Managing Teams
When it comes to scaling your operations, SmartSuite offers a neat solution through team management:
Creating and Managing Teams
- Team Setup: Create teams for structured permissions.
- Automatic Access: Onboard new members by assigning them to existing teams, which inherit predefined permissions.
Sharing Solutions Access
To effectively collaborate, sharing access is crucial yet needs to be handled cautiously:
Levels of Access
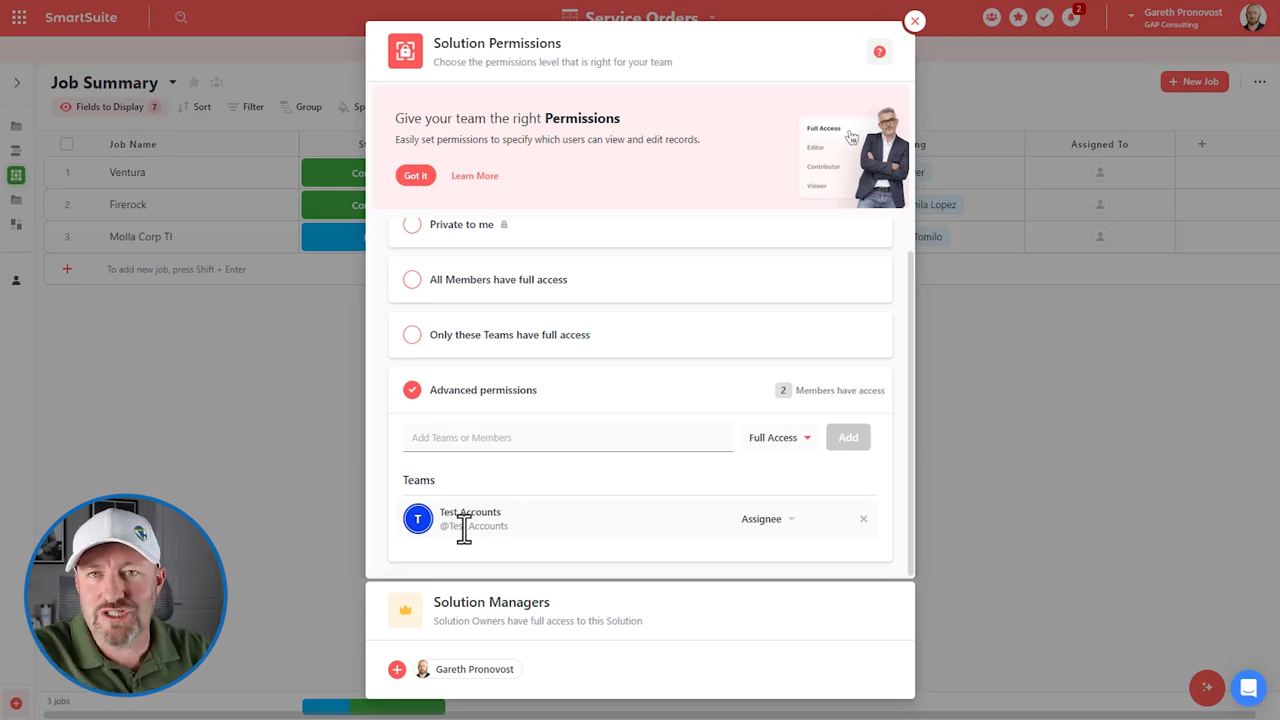
SmartSuite lets you granularly assign permissions:
- Solution Owners: Have full access to manage permissions.
- Team Members: Can be assigned as assignees, viewing and editing their assigned tasks only.
Custom Permissions
Through advanced permissions, specify who can create, view, or edit content, ensuring each team member works productively yet securely.
Hands-on: Managing Dashboard Permissions
As you build dashboards, setting permissions is vital to control access to sensitive data.
Step-by-step Permission Setup:
- Select Folder: Assign permissions at a folder level.
- Assign Team Access: Designate which team or individuals can view dashboard content.
Ensuring a Secure User Experience
Security and access control are foundational in SmartSuite:
Testing User Access
Always validate your setup by logging in as different users to ensure the correct data visibility.
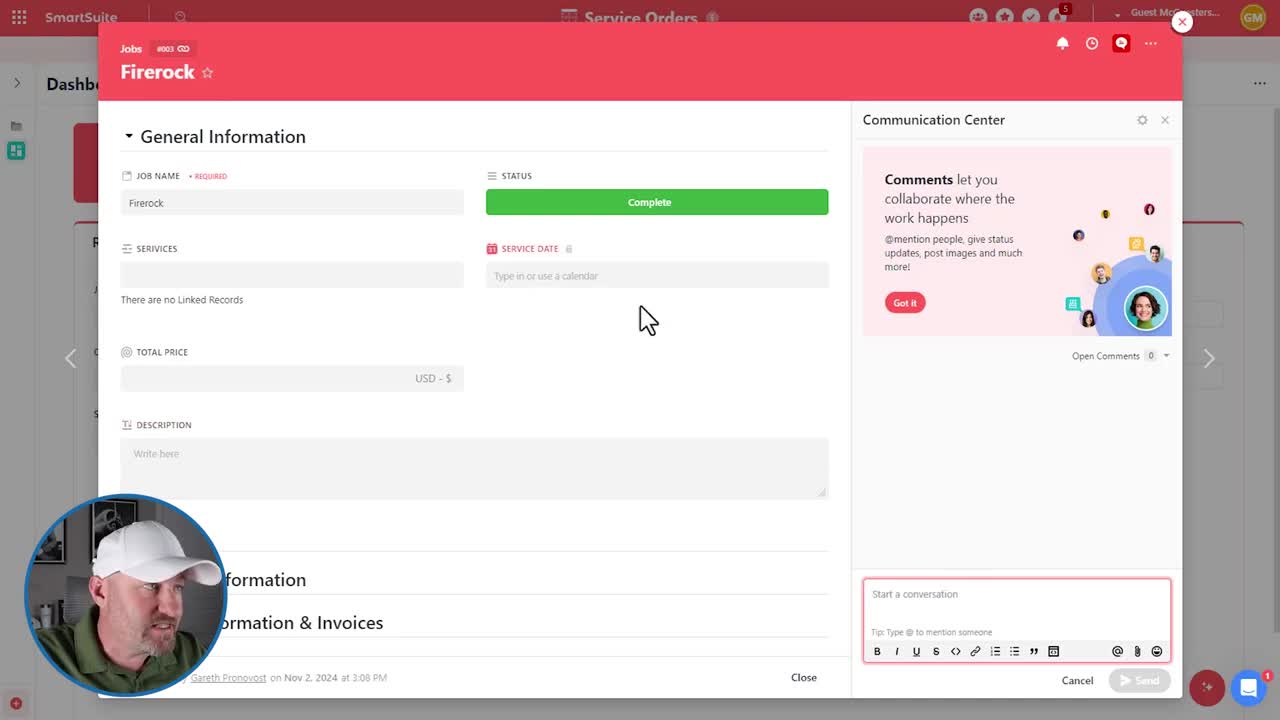
Comments and Collaboration:
Even with restricted access:
- Comments: Users can communicate within records they are assigned, facilitating seamless collaboration.

Conclusion
SmartSuite Dashboards provide a robust and flexible way to manage and interact with data. By harnessing the power of inherited user permissions, you can streamline operations, enhance security, and ensure each team member has the access they need to be productive. Dive in and start customizing your SmartSuite experience today, and remember, your journey to optimizing workflows starts with understanding user permissions.


.jpg)


