


Find Action to Update Records in Bulk
The last several of my blog posts have been focused on integrations using external tools like Make.com and OpenAI. This week we’re going to explore a new SmartSuite-native automations feature - the Find action - that allows you to look up records in an App and take action on the dynamic list of records that were found.
This capability lets us address a number of use cases that were previously out of reach. You might attach an existing contact to a record by matching on an email address, or add tasks based on a project type match.
Here are a few other use case examples to consider:
- Record search and filter: Use the "Find" action to search for records in a table that meet certain criteria, such as finding all tasks that are overdue, finding all leads that have a specific status, or finding all projects with a certain budget.
- Data validation: Use the "Find" action to validate incoming data before creating a new record or updating an existing record. For example, you can use it to validate that a certain field has a specific value before updating a record.
- Trigger-based workflows: Use the "Find" action in conjunction with other actions to create trigger-based workflows, such as sending an email when a new record is created, updating a record in another table when a record is updated, or sending a notification when a certain condition is met
Find Record Scenario
Let’s begin by outlining a scenario for the Find action we’re going to construct, along with its update record action.
Say we have a Customer Support Solution with two Apps: Tickets and Contacts. In this simplified implementation, we’ll just capture an email address from the person opening the ticket. That works fine, but maybe we’re using a Form View to allow people to submit tickets themselves, and we don’t want to show the Linked Record to Contacts and let the submitter view other Contacts.
That’s where a find action comes in - we can use the value of the email submitted in the Tickets record to look up the corresponding record in Contacts and link it for us.
Here are our two Table:

Configuring the Automation
With the structure in place, we’ll open up the Automations interface and create a new one. To manage our scenario, we’re going to need three things:
- Trigger - We’ll use the When a record matches a condition trigger here so that our automation will fire on record create or update when the condition starts to match.
- Action #1 - Find Records. This action will return a record from Contacts if there is a matching email.
- Action #2 - Update Records. We’ll use this action to update the found Contact record, linking it to the triggering Ticket record.
Configuring the Trigger
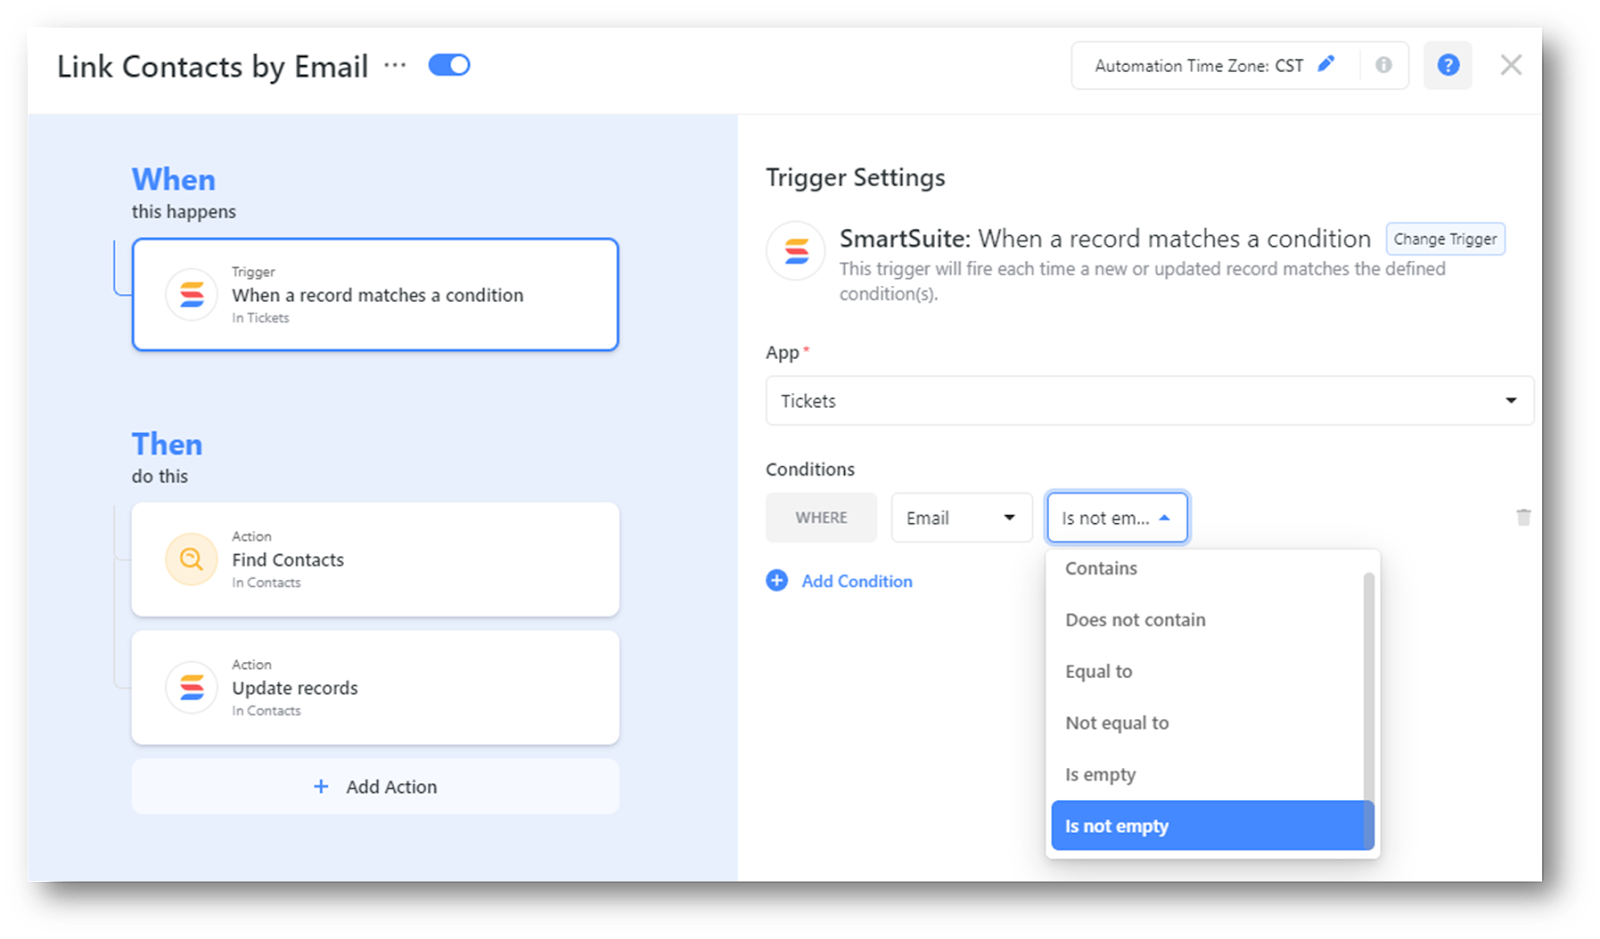
Select the When a record matches a condition trigger to get started. You will then want to:
- Choose “Tickets” app in the App selector
- Click Add Condition
- Choose the Email field and select the Is not empty condition
What this will do is trigger the automation as soon as the record first has a value in the email field, whether it has just been created or if an email is subsequently provided in a record update.
It will look something like this:
Configure the First Action: Find Records
Choose the Find Records action to begin configuring your first of two actions. Select the current Solution (note that it is possible to find records in different Solutions!) and then pick the “Contacts” App.
It is optional, but I suggest that you change the name of the action in the “Search Name” property - here we’ll call it Find Contacts. In single find-update scenarios this is not really necessary, but if you have a larger number of find and update actions it can make things much easier to configure.
Now we specify the find Conditions.Click Add Condition, then select the Email field. We’ll then use the “Contains” operator and map in the Email field from our trigger to search for a match. We could also use Equal To in this step, but the contains will allow us to handle multiple-email fields as well as single email fields in the Contacts App.
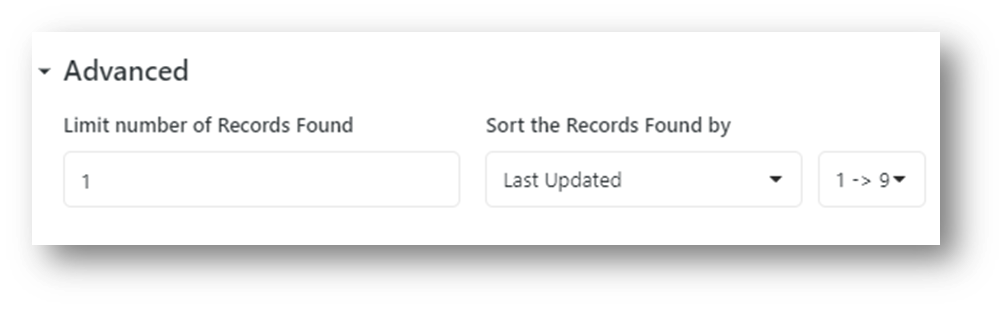
Finally, expand the Advanced section. You’ll see that Find defaults to returning a maximum of 100 records, sorted by their Title field. This is an important pair of settings in situations where you might return a number of records but you only want a single value - if you do not specify a sort order (perhaps by latest update date or something similar) the system will return records in the order that they were created.
Here, we’ll set a Limit of 1. We’ll set a sort to “Last Updated” to get the most recently updated Contact if there happens to be more than 1 with the same email address (we’re assuming in this scenario that contacts will have unique email addresses - you could also return all of the contacts that have the matching email if this is not the case in your implementation).
Configure the Second Action: Update Records
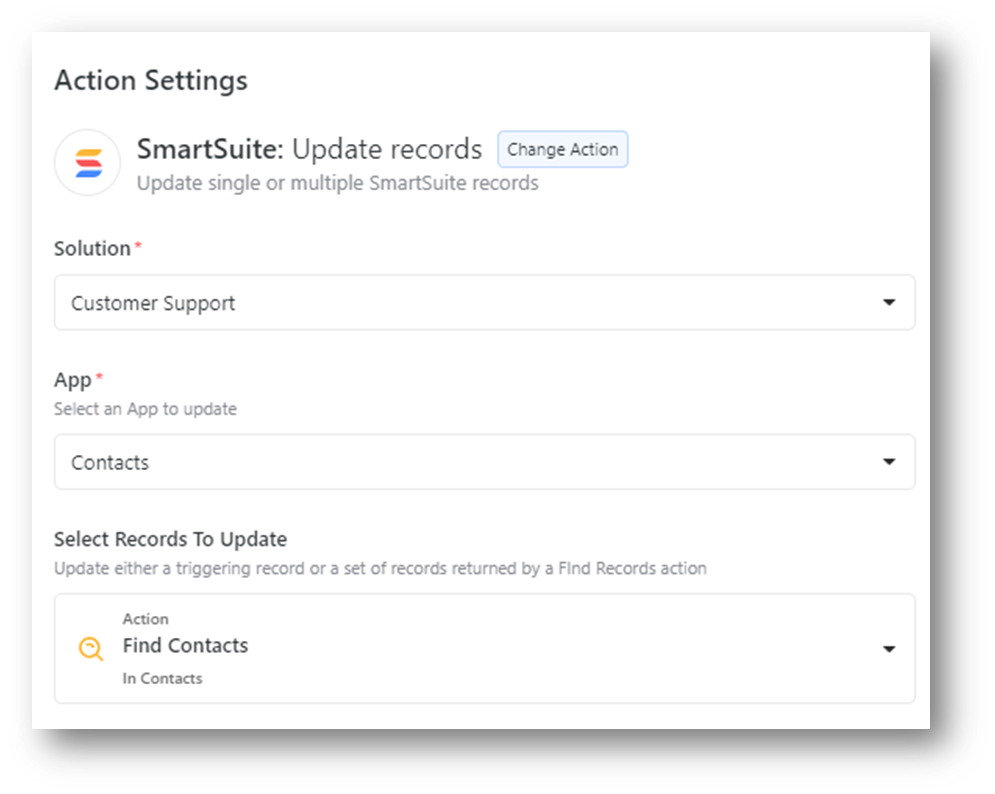
With our Find action configured, we’re ready to update the found records using a second action. Click the Add Action button and choose “Update Records.”
From there we’ll again choose our current Solution, this time selecting the Contacts App as the App to update.
In “Select Records to Update,” the system will automatically choose the Find action you just configured. Verify this by checking that it says “Find Contacts” in the value.
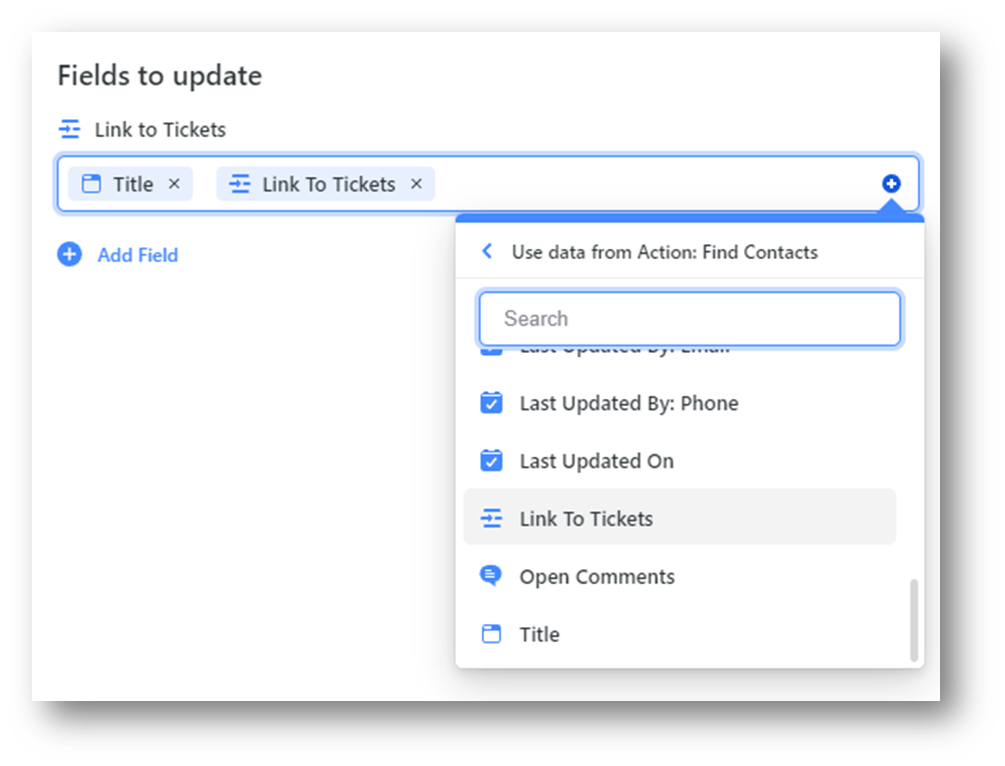
Add a Field to Update and choose the Linked Record to Tickets. For it’s value, we’ll want to select two fields:
- The Title field from the Tickets app used in the trigger
- The Linked Record field to Tickets from the found record
The reason for the second value here is that currently when you update a Linked Record field you replace its existing values with the new one(s). By also putting the current values of the Linked Record field into the mapping you’ll preserve existing linkages. (NOTE: We’re working on adding the option to append or replace for this action!)
With that step complete, your configuration can be saved and activated. Click Save Automation and choose Yes, switch it on to activate it.
The Automation in Action
With everything in place, you can try out new and updated records that contain emails matching your existing contacts records. You’ll see - after a short delay - that the Contacts are automatically linked for you.

Conclusion
I hope that this article helps you with your own Find Records automations. Please share your use cases and configuration steps with the SmartSuite community!
SmartSuite provides work platform for standardizing workflows in the following areas:
- Governance, Risk & Compliance
- IT & Service Ops
- Project / Portfolio Management
- Business Operations


