


Learn how to integrate SmartSuite with OpenAI using the button field type and Zapier
I recently created a video that demonstrated a Button field-initiated integration with OpenAI to automate the process of using AI to generate content from a trigger phase stored in a SmartSuite record. This blog post is a follow-up to dig into the technical details and offer a step-by-step guide to configuring the components involved. Aside from SmartSuite the integration requires either Zapier or Make.com (I’ll describe how to use Zapier in this post and follow up with a version describing Make.com configuration) and OpenAI.
The idea for this came from the conversations people have been having on LinkedIn about creative uses for OpenAI. We work with a number of companies that need to generate lots of social media content who have suggested that AI could be a great help. The completed integration allows the user to click a button on a “Blog” record that executes a process that (1) gets the content of the SmartSuite record, (2) sends the blog topic text to OpenAI, and (3) updates the original record with the output from OpenAI and sets the record’s status to Complete.
Here are the steps:
1. Create an OpenAI Account
- Create an OpenAI account (link here) if you don’t already have one.
- In your OpenAI account, click on your name, then select View API Keys.
- Create a new API key and store the value (we’ll use it later)
2. Log in to Zapier
- Log in to your Zapier account (create one here)
- Create a new Zap and give it a name
3. Create a Zap trigger
- Add a Webhooks by Zapier trigger
- Select the Catch Hook event
- Select the Test Trigger tab and copy the URL (We’ll use it in the next step)
- NOTE: Do not click the “Test Trigger” button on this page until you have completed step 4 below - we have to send some data to test first!
4. Create a button field in SmartSuite
- Navigate to the Solution and App you want to use for your blog content
- Add a Button field and give it a name
- Change the label to “Generate” or something similar
- Select URL Formula in the Action section
- Enter the following formula and save the field:
CONCAT("[Webhook_URL]?id=",REPLACE([Auto Number],"#",""))
Note: Replace [Webhook_URL] with the URL you copied from Zapier
What’s happening here is you’re combining the URL with an id parameter that has a value of the current record’s Auto Number field (which always exists), removing the hash (#) symbol that precedes the number with the REPLACE() function.
- Create a text field in the app called Blog Topic
- Create a text area field called Blog Content
- Create a record that has a value for the Blog Topic field
- Click the Generate button
5. Test the Zap trigger
- Return to the Zap you previously created
- Go to the Test Trigger tab
- Click Test Trigger and see that it received a value from your button
6. Add a SmartSuite action to your Zap
- Click Action and search for SmartSuite
- Select the Find a Record in SmartSuite event
- Provide your SmartSuite credentials, including your API key and Workspace Id
- Select the Solution and App that hold your blog records
- Select Auto Number in Search by Field
- Select the output of your trigger in Search Value - it will look something like this (the one labeled “Querystring”):
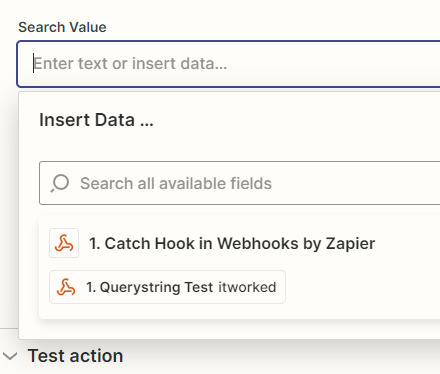
- Test the Action
- See that record data is returned by SmartSuite
7. Add a Custom Webhook action in Zapier
- Click the plus (+) symbol below your Find action
- Add a Webhooks by Zapier action
- Select Custom Request in Event
- Select POST in Method
- Set URL to https://api.openai.com/v1/completions
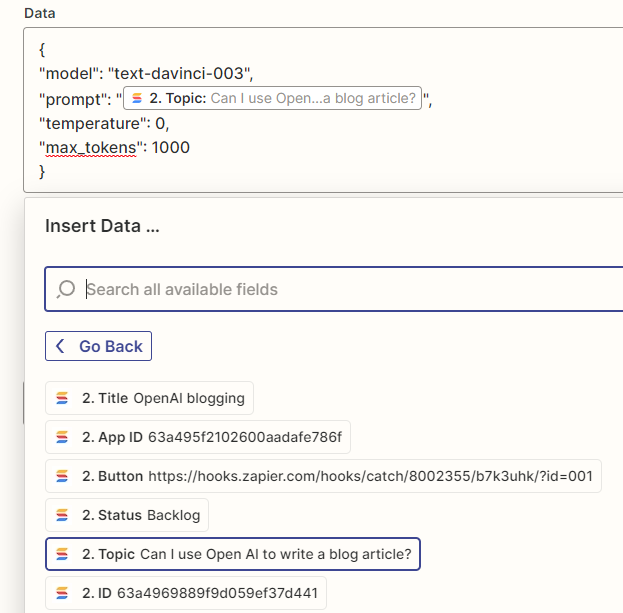
- Paste the following JSON into Data:
{
"model": "text-davinci-003",
"prompt": "[Blog_Topic_Field]",
"temperature": 0, "max_tokens": 1000
}
FYI: More information is available able the OpenAI API here.
Note: Replace [Blog_Topic_Field] with the Blog Topic field from your Find action. It should look something like this:
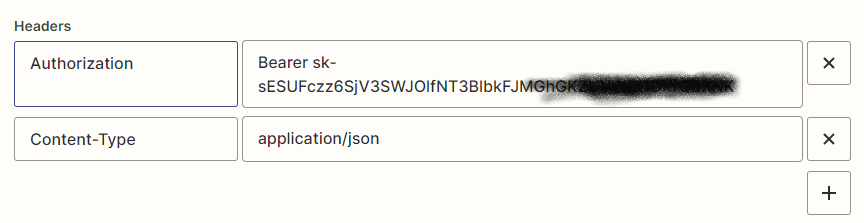
- Add Header 1:Authorization: Bearer [Your_OpenAI_Key]
- Add Header 2: Content-Type: application/json
- Test the Action and see that OpenAI response with something similar to this:

8. And an Update Record action to your Zap
- Click the plus under the Webhook action
- Add a SmartSuite action
- Select Update Record in Event
- Connect your SmartSuite account created previously
- Select the Solution and App for your blog content
- Set the Record and Title fields to the Title field from your Find action:

- Set the Status field to Complete
- Set your Blog Content field to the Choices Text value returned from the OpenAI Webhook action:
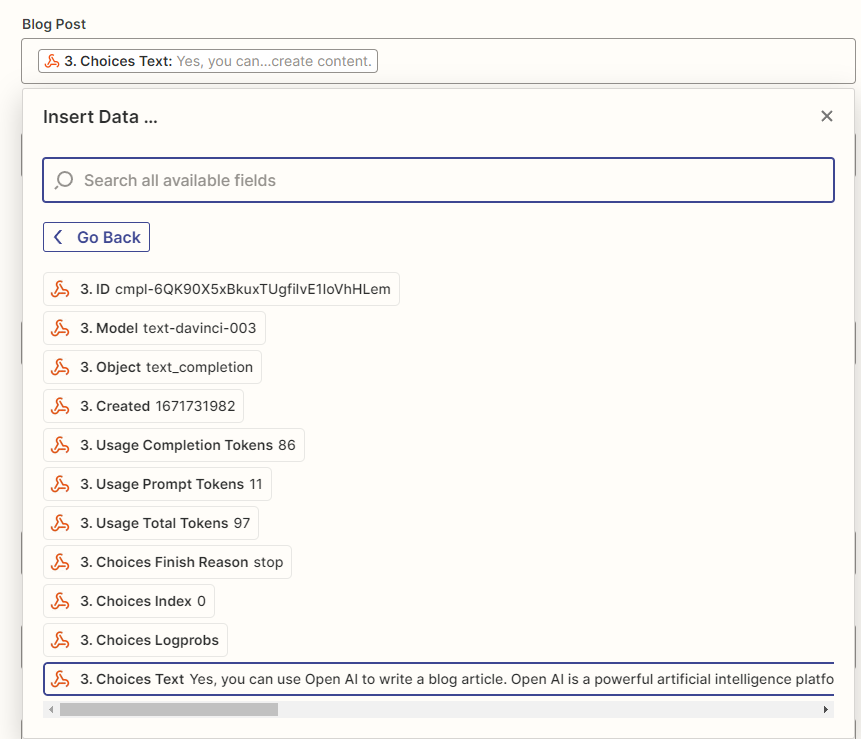
- Test the action and see that SmartSuite returns results like this:
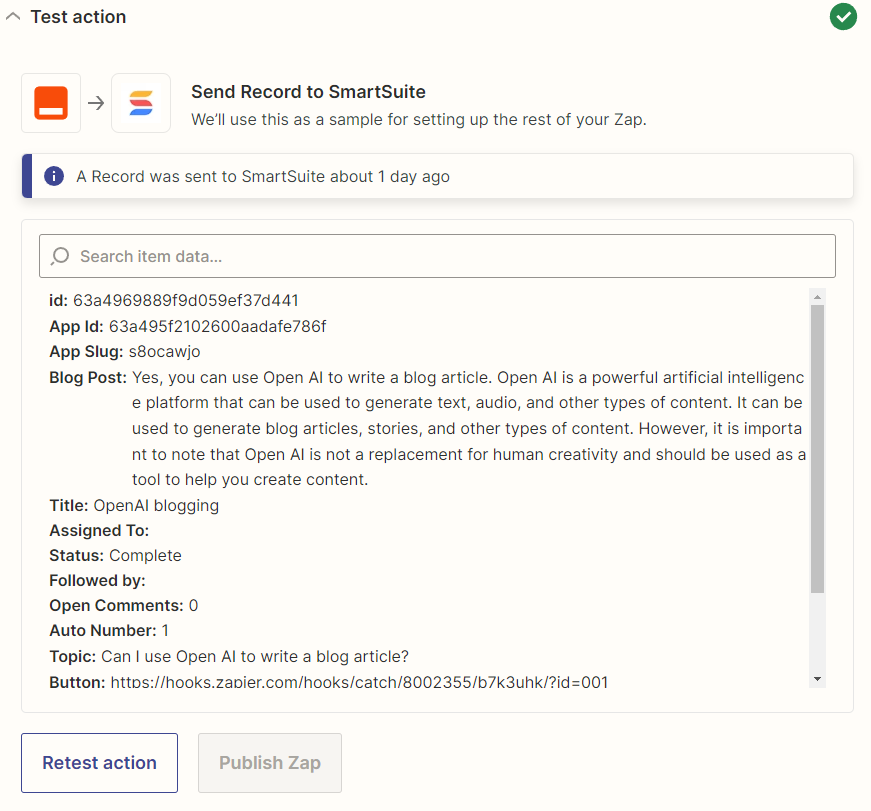
- Publish the Zap
9. Return to SmartSuite
- You’ll see the record updates you just made reflected in your test record
- Try adding another record with a different blog topic and click Generate
- In a few seconds you’ll see the record status change to Complete and your Blog Content field will be populated
- You’re done!
I hope that this blog article gets your wheels turning and you start to think about all of the possibilities for this type of automation. Please share your use cases and configuration steps with the SmartSuite community!
SmartSuite provides work platform for standardizing workflows in the following areas:
- Governance, Risk & Compliance
- IT & Service Ops
- Project / Portfolio Management
- Business Operations


