


There are certain use cases where you need a collection of records to accurately track and manage a workflow. I was speaking with a company that manages online learning classes, students and schedules. They had a need to create a series of records for each new student that was added to the program, reflecting that individual student’s coursework, scheduling, grades and completion status.
Some scenarios of this type could be managed with SmartSuite automations, using Create Record actions to generate the new schedule records. In this instance, however, the customer wanted to pull a dynamic list of items from an App that could be modified at any time - and there would be 30+ items that need to be created.
In this case, we looked at the possibility of using Make to pull the list of records from their “template” App, iterate those records, and create a new record for each one in their Assignments App. What’s more, the whole process could be kicked off from the Student record, providing context to populate the Assigned To field in the created record, retrieve the appropriate term information, and eliminate all of the manual onboarding work that would otherwise go into setting up records for another student.
I thought that this flow could be broadly applicable to a variety of use cases. A general contractor could create a number of tasks for a new renovation project. A law office might want to create client onboarding tasks for their paralegals. A compliance manager could generate a series of assessment questions for an internal audit. The possibilities are really endless - any process driven off a list of “seed data” could benefit from this type of automation. Let’s dive in and see how it works.
1 - Solution Structure
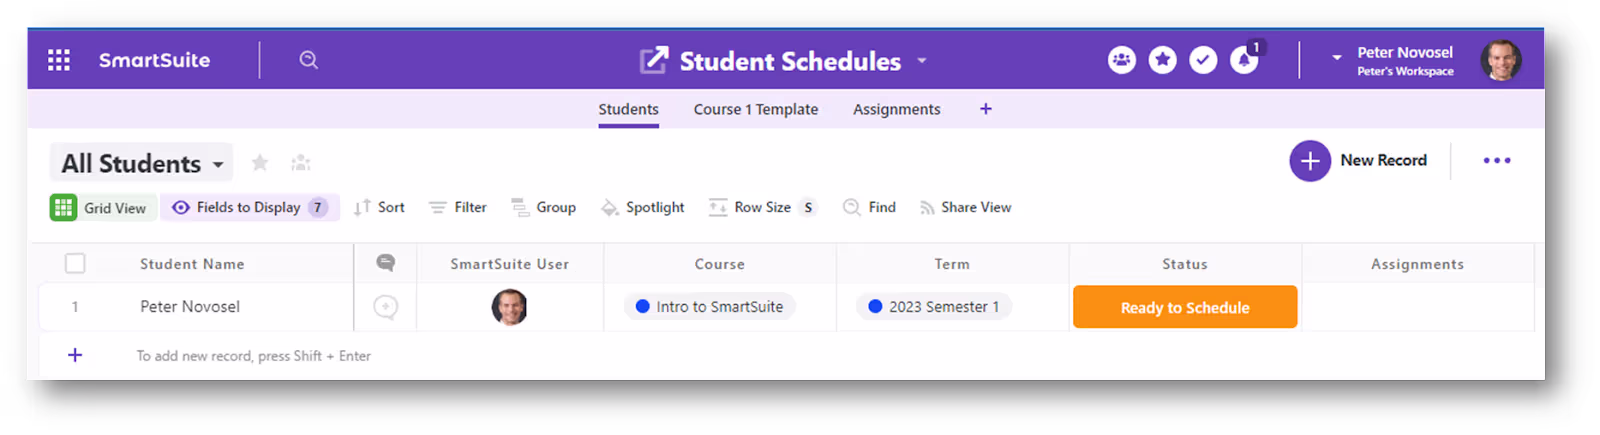
Before we can create our automation, we’ll need to set up a basic Solution and set of Apps to store our data. We’ll model out a basic version of the Student assignment scheduler I described in the intro. In our Student Schedules Solution I’ve created three Apps:
- Students: Holds our student records, and is the App we’ll monitor for changes.
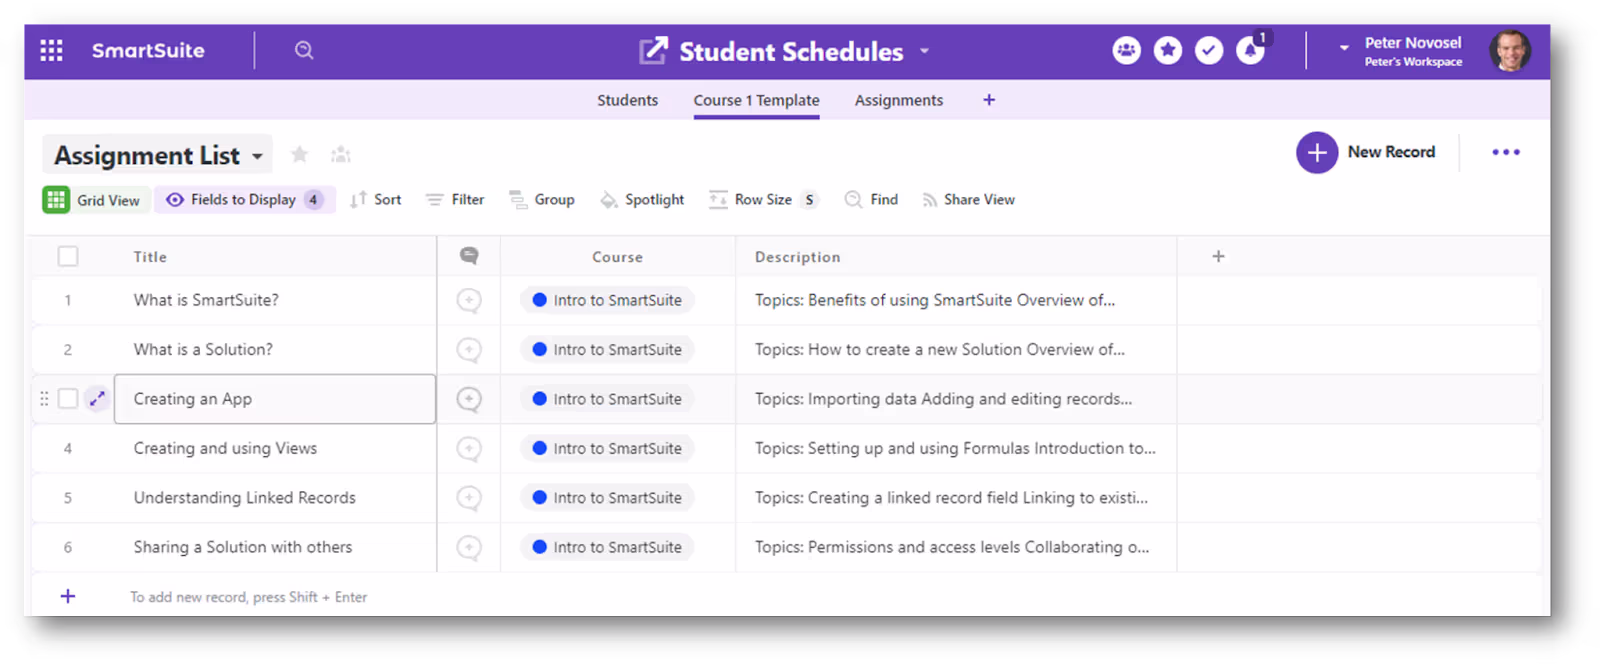
- Course 1 Template: The App containing the “template records” we’ll use to create the Assignment records.
- Assignments: Holds the generated per-student assignments for each course.
Students App
Course 1 Template App
Assignments App
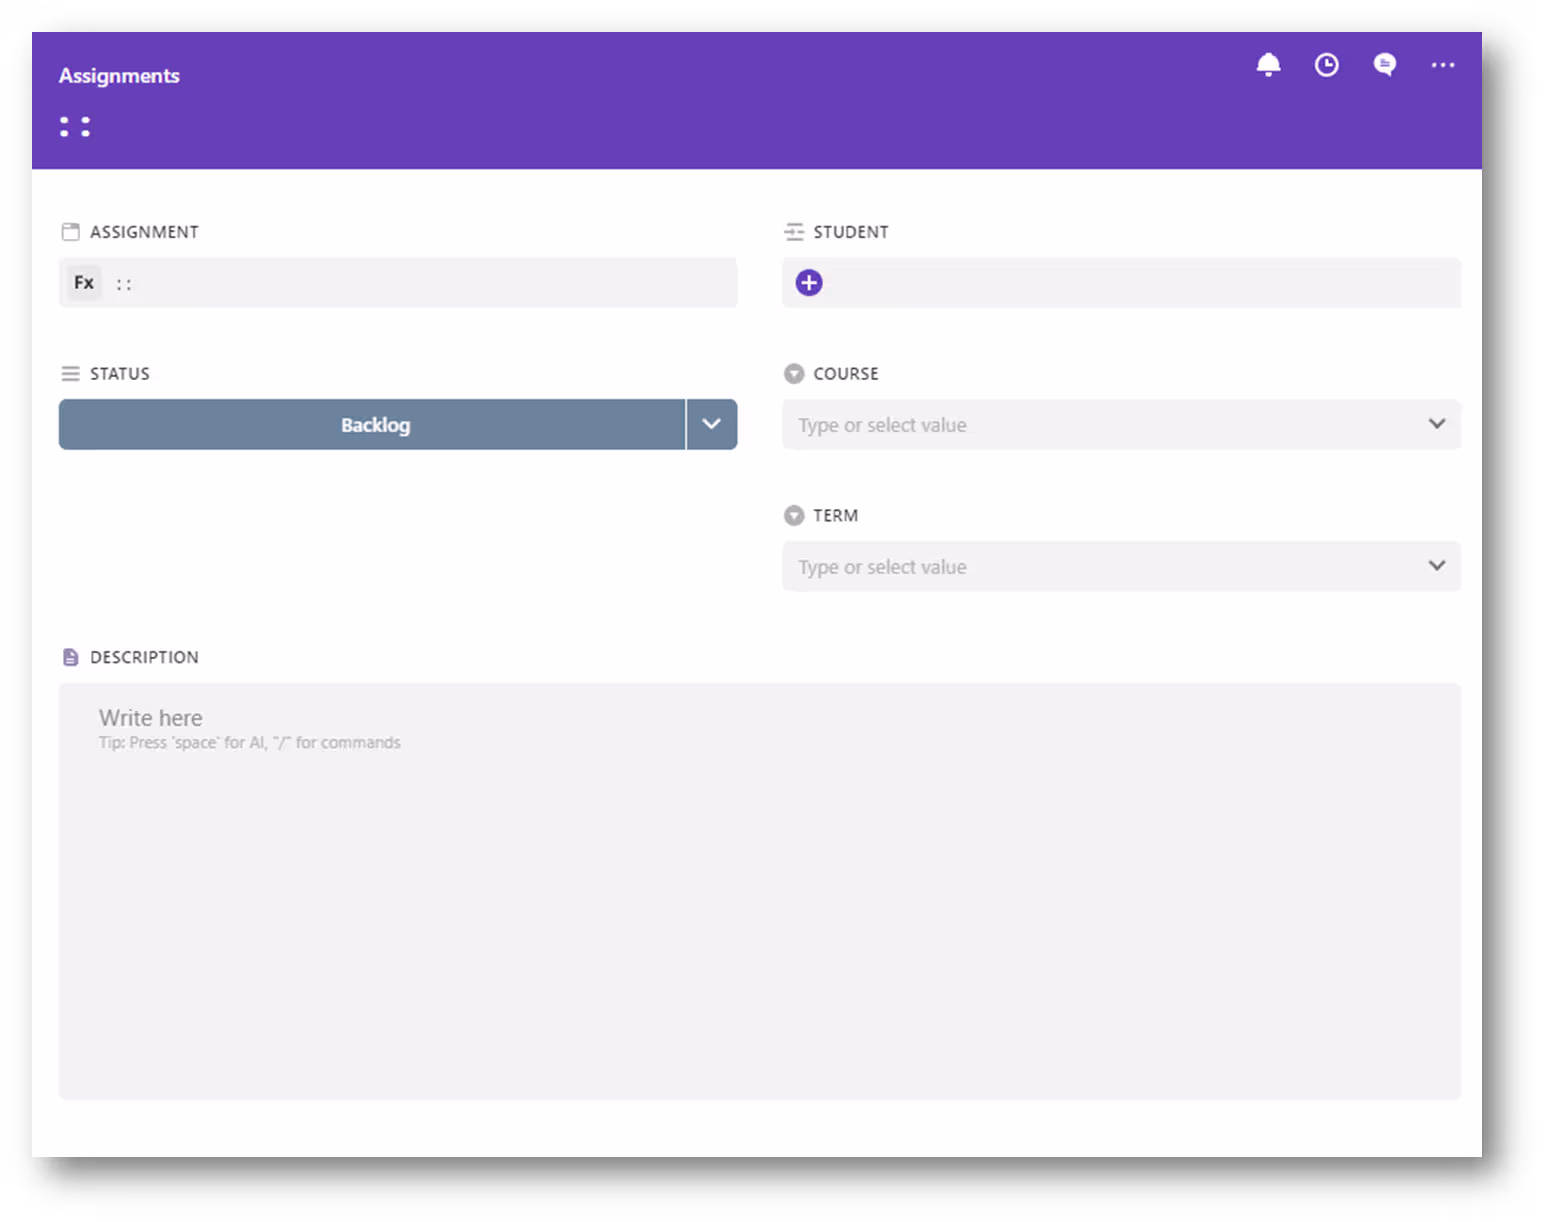
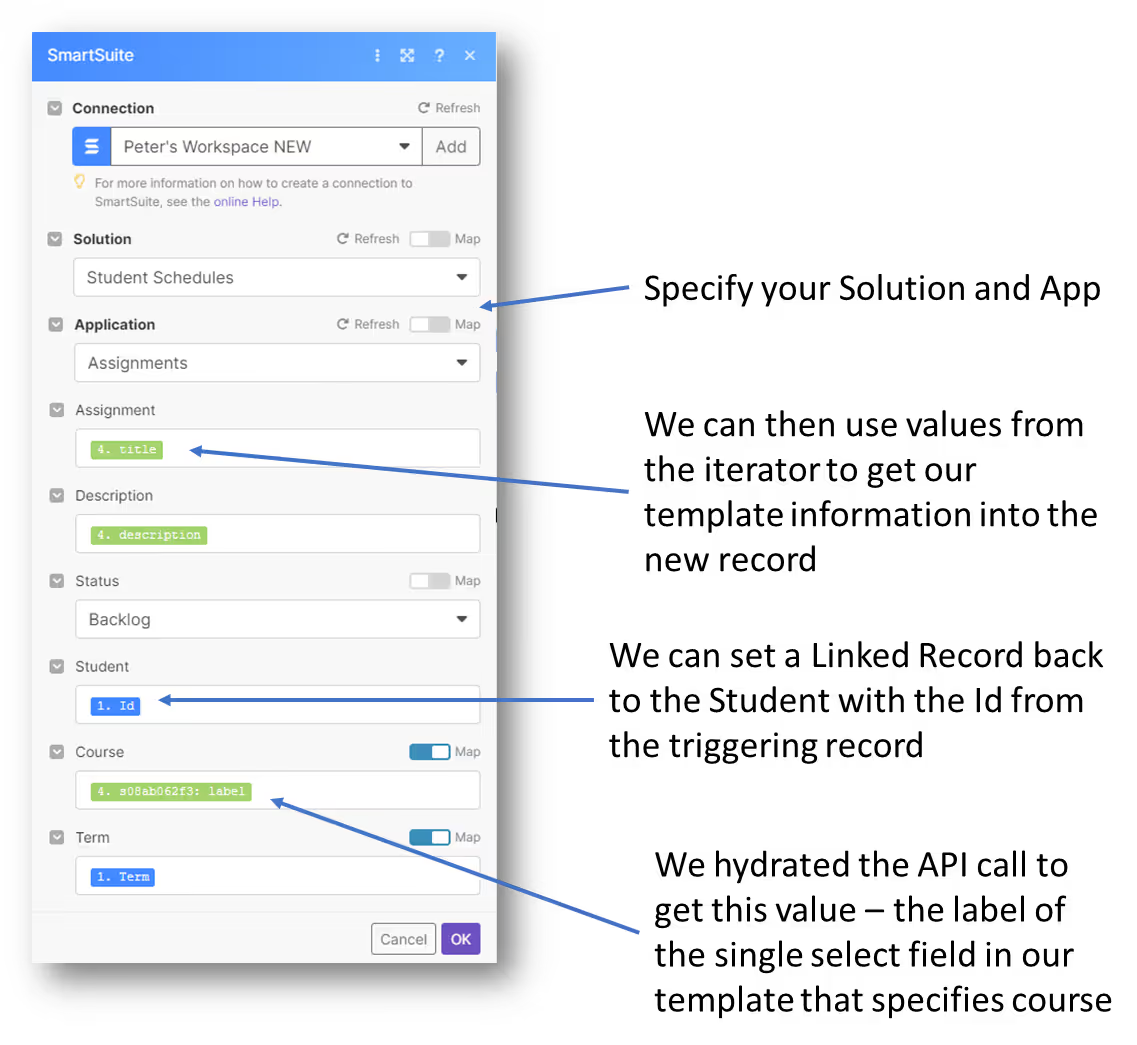
In the Assignments App I set the Assignment Title field to be auto-generated, using a combination of Term, Course and the Student Linked Record value.
2 - Make Scenario
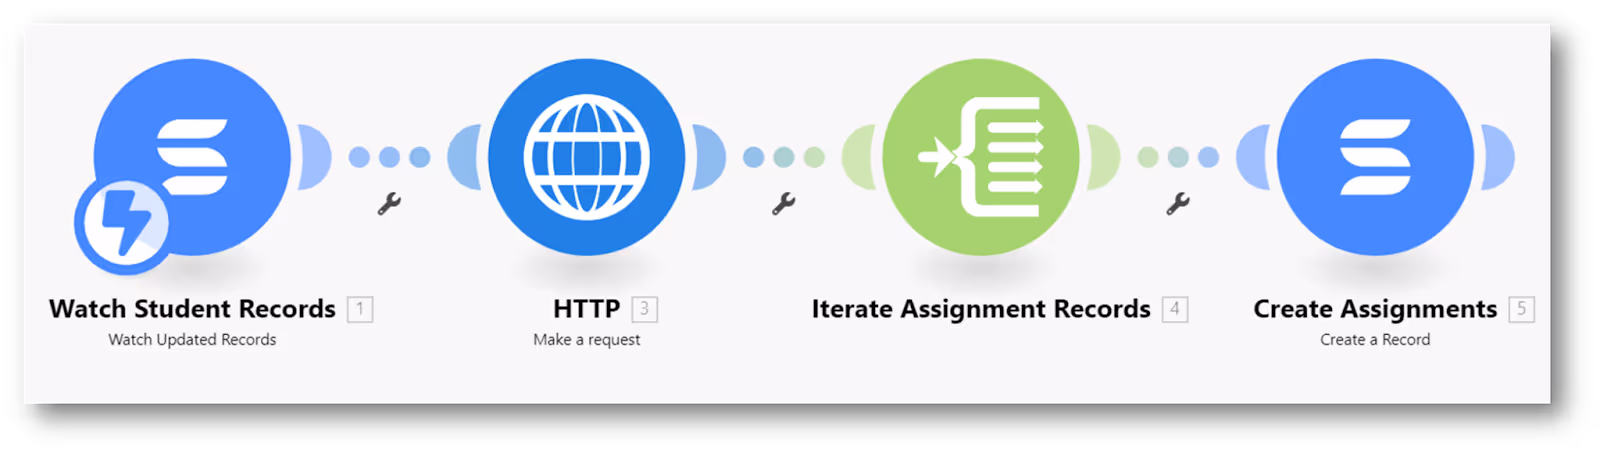
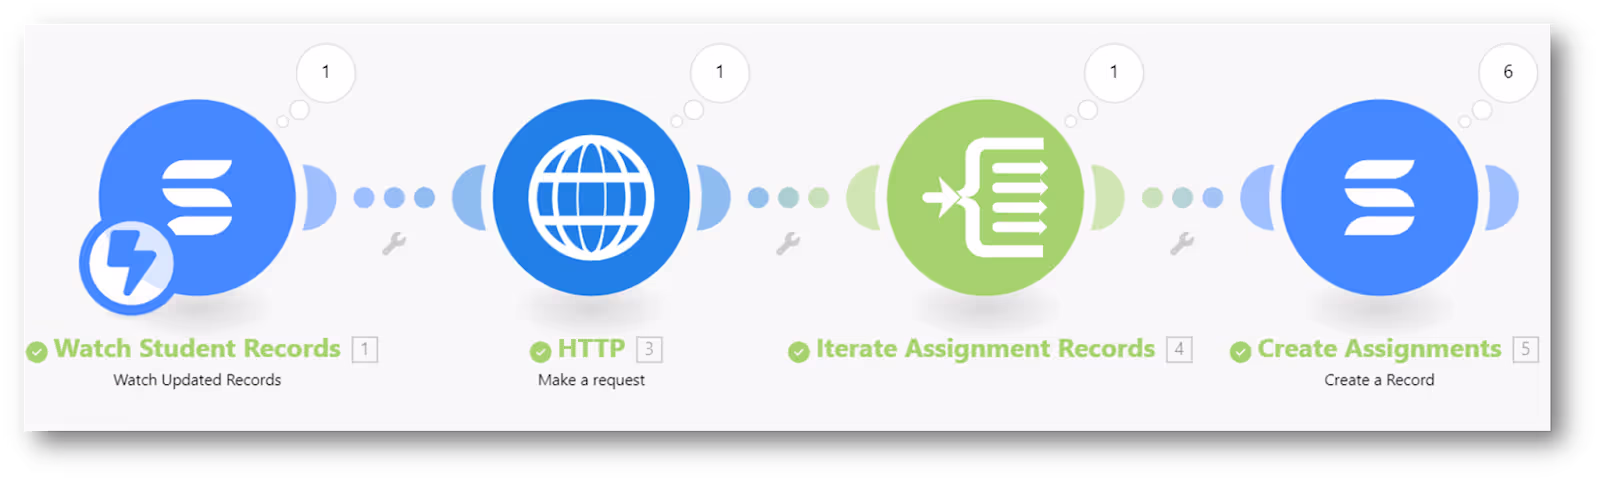
Now that we have our SmartSuite App structure defined, we can create our Make scenario. It will have 4 modules:
- Watch SmartSuite Record Updates: We’ll listen to the Students App to get record updated events.
- HTTP - Make Request: This step can be done with either SmartSuite’s “Make an API call” module or the Make HTTP request module. We’ll use Make’s module here to show you all of the components of making REST calls from Make, and it will retrieve all of the records from the Course 1 Template App.
- Iterator: We’ll use a Make Iterator utility module to perform an action for each record that is received from our HTTP request.
- Create a Record: Finally, we’ll use the SmartSuite “Create a Record” action to create our assignments, using the data that we’ve retrieved.
Here is what the entire flow looks like:
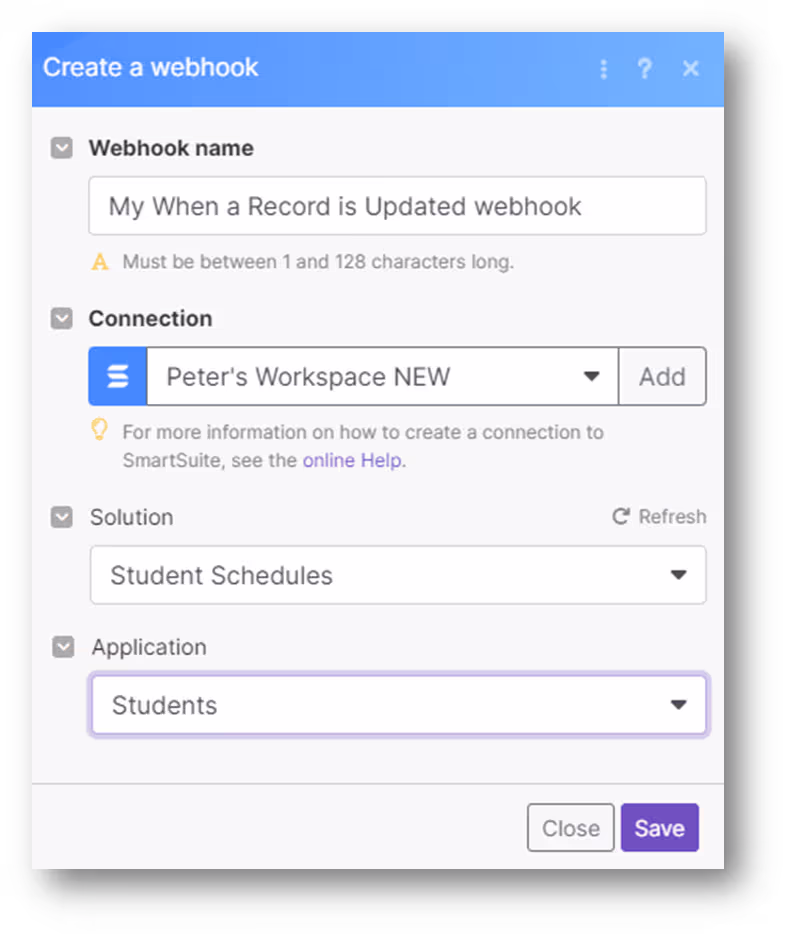
2.1 - Watch Record Updates
Setting up our Record Updated watcher is simple - just select a Connection (or add a new one, which requires your Workspace Id and your API key), pick your Solution and then the target App.
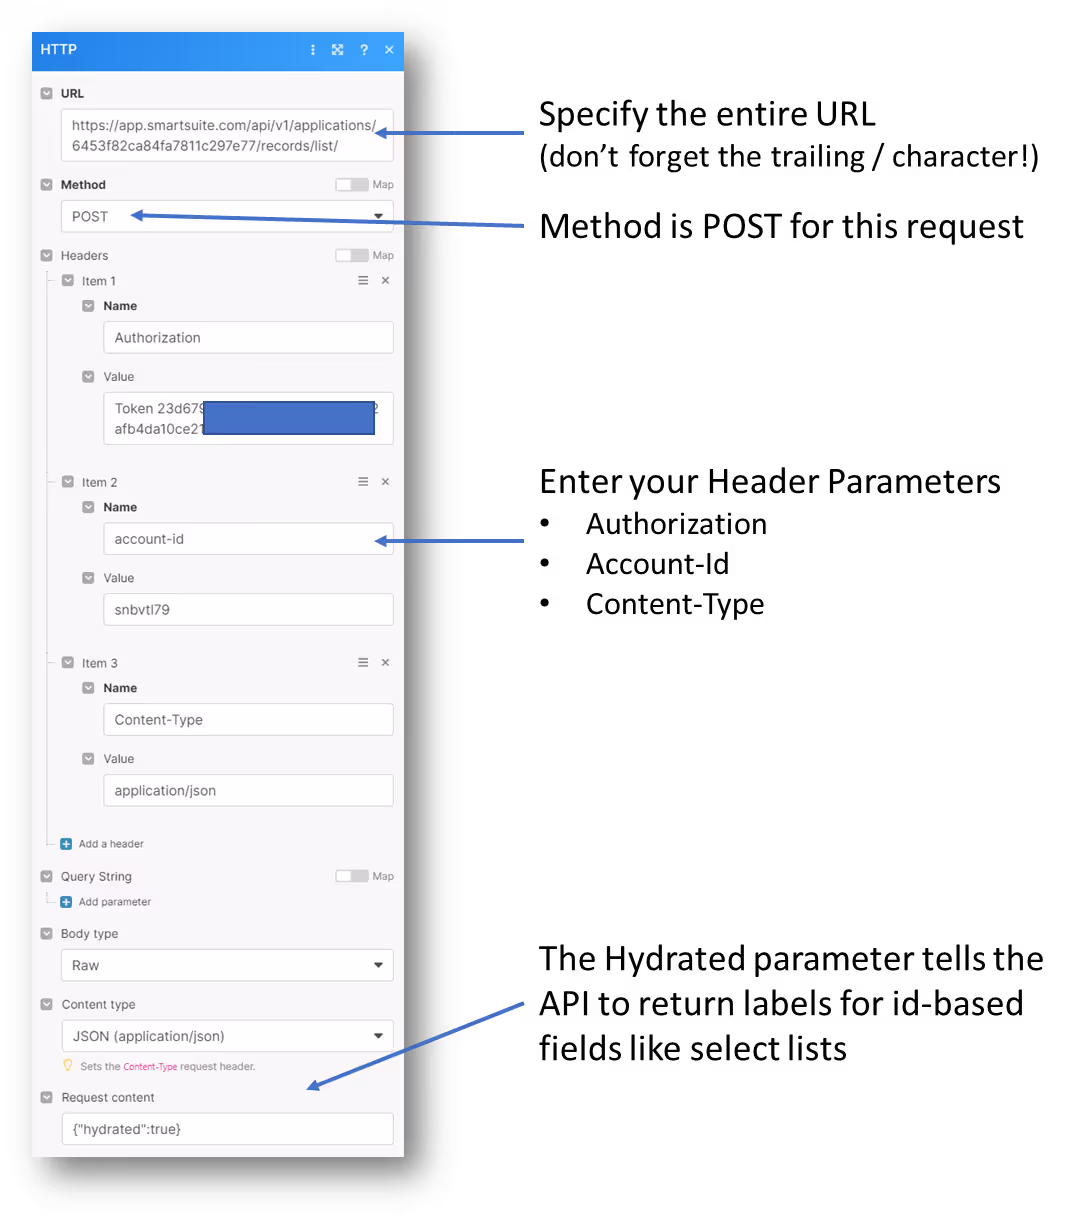
2.2 - Make HTTP Request
Making the HTTP request is the most involved part of this scenario. You’ll need to set the following:
- URL: https://app.smartsuite.com/api/v1/applications/{app_id}/records/list/
- Method: POST
- Headers:
- Authorization
- account-id
- Content-Type
- Body Type: Raw
- Content Type: JSON
- Request Content: {“hydrated”:true}
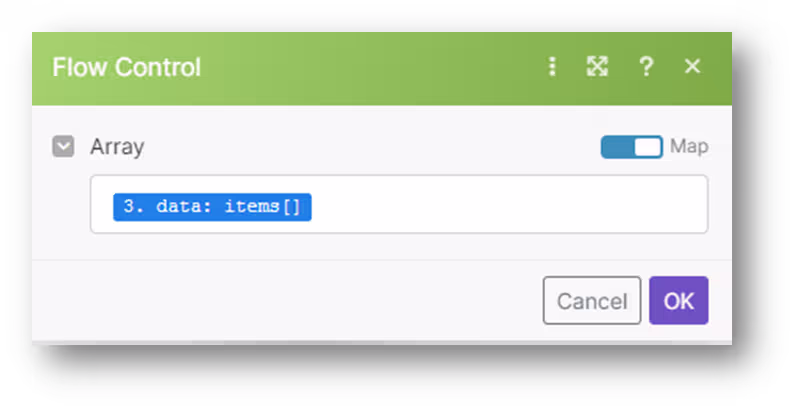
2.3 - Iterator
After the HTTP call, we’ll connect an Iterator. This is a utility module that allows you to perform a function for each item in an array (our template records). It takes a single parameter:
- Array: data: items[]
2.4 - Create Record
The last step is to use the data from the original trigger and the HTTP call to construct our new record content.
3 - Run the Scenario
With everything configured, you can click “Run Once” to start listening for an update. Make an update in the student record (make sure all of your values are specified before toggling on the run button) and you’ll have the scenario run one time.
Each step will indicate that it received data in a “thought bubble” near the module. You can click these to see the data received, and the data output.
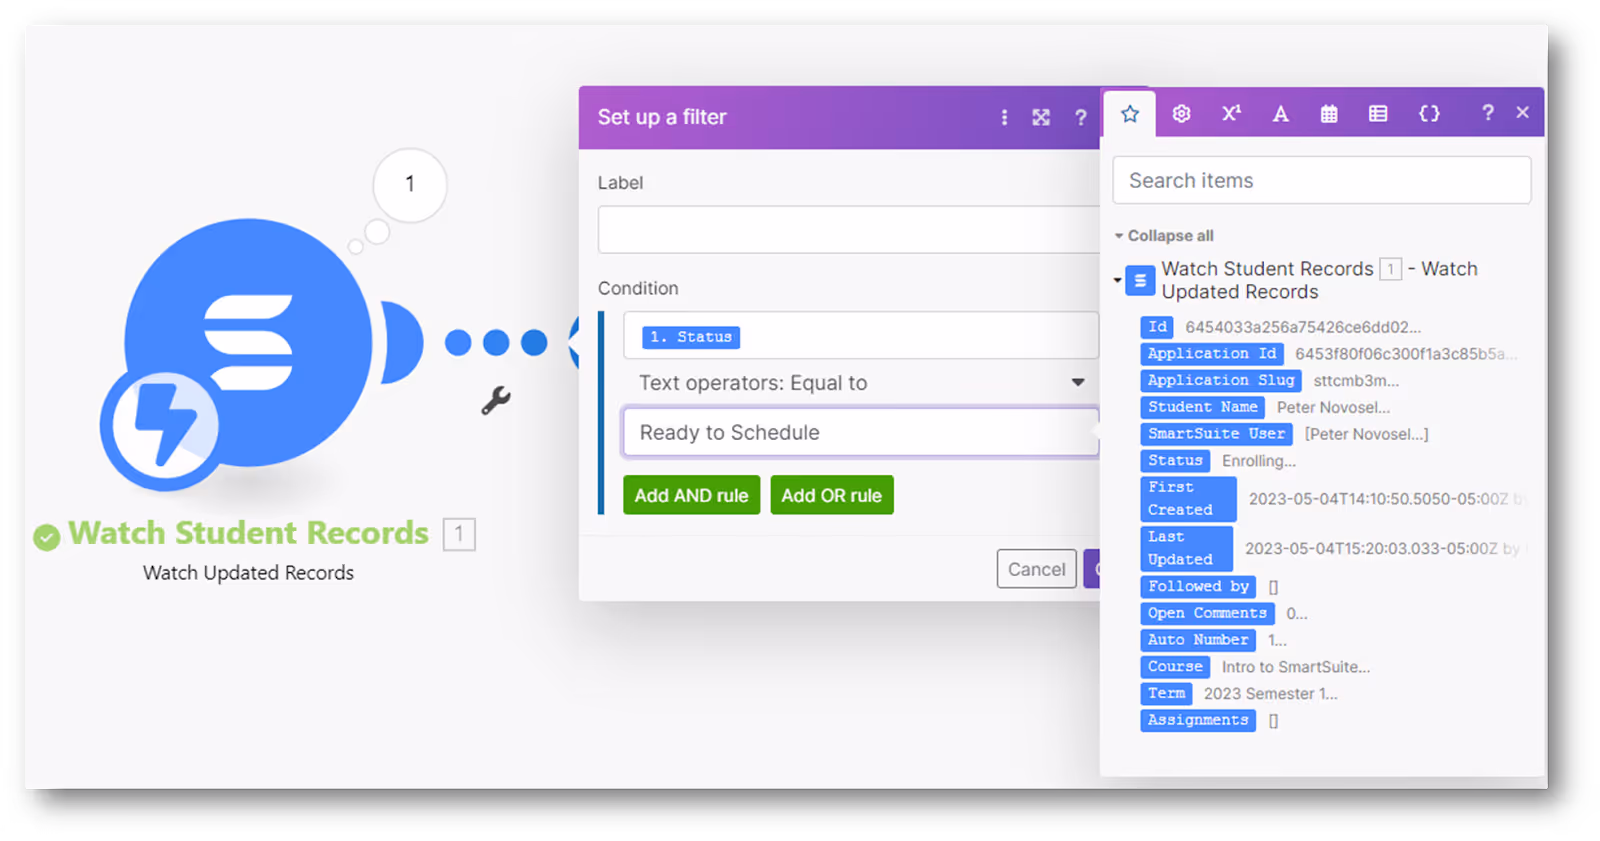
Note that you can also add a filter between the watcher and the HTTP module to only continue if the status has changed to some value, like “Ready to Schedule.”
When you’re satisfied with the flow, go ahead and click the schedule button to the ON position. Now the scenario will start watching for updates and will run every time a student record is saved in the “Ready to Schedule” status!
I hope that this tutorial will help you automate your own template-driven processes and make it easy to generate records that power your workflows. Please share your own solutions with the community, and happy building!


