


Adjusting Row Sizes in SmartSuite
Hey there, productivity aficionados and SmartSuite enthusiasts! In today's installment of Smart Tips, we're getting up close and personal with the ins and outs of customizing your workspace to perfection. Yup, you guessed it: we're talking row and column customization. So grab a seat, let's dive in!
Embracing Flexibility: Adjustable Row Sizes
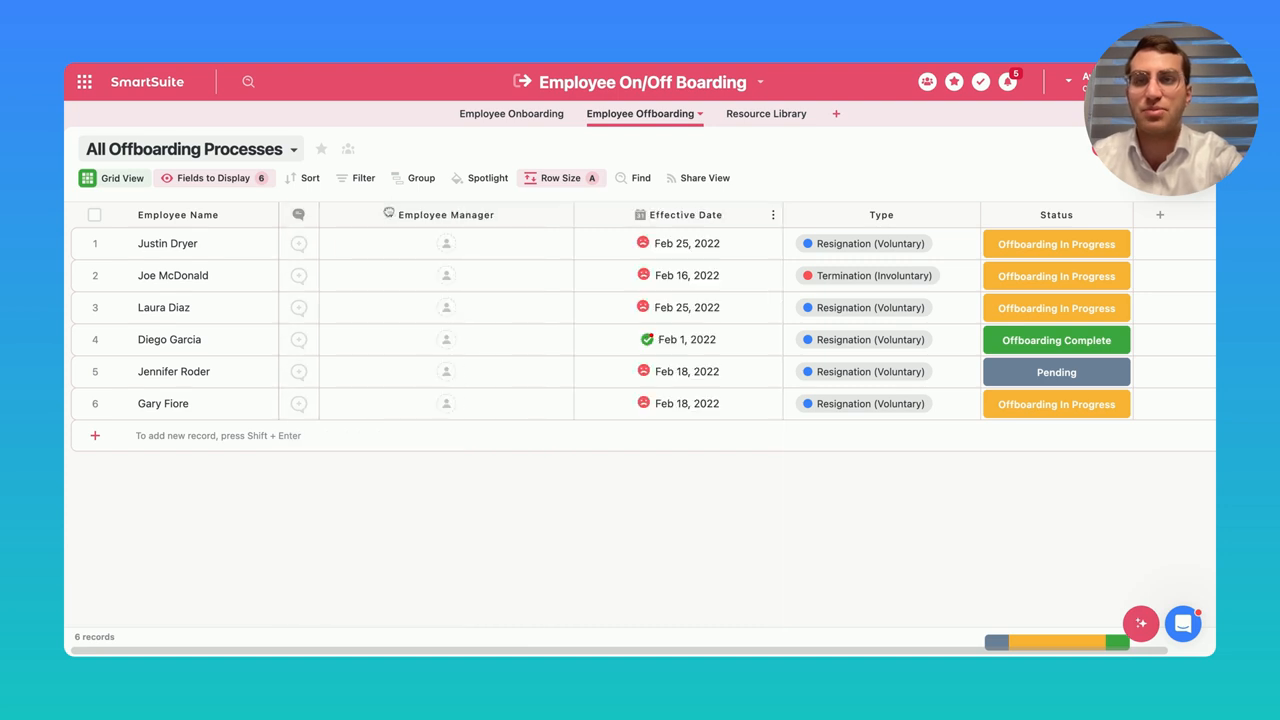
When it comes to managing your data, the visual layout of your SmartSuite space is critical. Picture this: you're skimming through a sheet filled to the brim with valuable info, but oof, those rows are a squint-fest. Hold up, don't reach for your glasses just yet—changing those row sizes is a breeze.
Here's the scoop: SmartSuite comes equipped with a nifty feature called 'row size control'. It's essentially your magic wand for deciding how much screen real estate you want each piece of data to occupy. You'll find options ranging from medium to large, and all the way up to extra-large. A sight for sore eyes, quite literally!
But wait, there's more. Ever had content so chock-full of details that a one-size-fits-all approach just doesn't cut it? Fret not—auto-size is here to the rescue! With a simple click, SmartSuite tailors your row height based on the content that's being showcased. Like a tailor fitting a suit, SmartSuite makes sure everything looks just right.

And here’s a little extra tip: while aesthetics are important, don't forget about readability and the user experience for your team. Finding that sweet spot, where information is both legible and well-presented, is key to a smooth sail through data seas.
Columns: Shaping the Scope of Your Data
Now, let's shift our gaze from the horizontal to the vertical—yes, columns are getting the spotlight next. There's something satisfying about finding that perfect column width that displays all your information neatly, without those dreaded '...' truncations.
In SmartSuite, column resizing is as easy as pie. Whether you want to expand them to unveil full titles or tighten them up for a cleaner look, the power lies at the edge of each column header. Click, hold, and drag until you hit that column width sweet spot.
But what if you want to mix things up? Say you suddenly realize that the order of your columns is akin to socks in flip-flops—just not right. Don’t worry, SmartSuite won't have you locked in. Reordering is as simple as clicking the column you want to move and dragging it to its new home. It's like rearranging furniture, but without the backache!
And for the pièce de résistance, the fields display menu awaits. It's the grand central station of column management. Add new fields, adjust existing ones, or even send some on a sabbatical with just a few clicks. The goal? A workspace that’s as dynamic as your needs.
Building a Smarter Workspace
The beauty of SmartSuite lies in its adaptability and how it empowers you to shape your digital workspace. Gone are the days of one-size-fits-all spreadsheets; now, it's all about making your data dance to your rhythm. Remember, your workspace should evolve with you, offering comfort and efficiency, no matter the complexity of your projects.
So there you have it—your quick guide to row and column customization in SmartSuite. Whether you're looking for that visually appealing layout or you need to optimize for your team's productivity, tweaking these dimensions will help you unlock the full potential of your workspace.
Before we wrap up, a nudge to all you forward-thinkers and idea-sharers out there: got a Smart Tip you're itching to see? Or perhaps a trick up your sleeve you think can benefit the SmartSuite community? Head to the comments or ping us with your ideas, and who knows—next week's episode might just feature your golden nugget of wisdom!
Until then, keep it smart, keep it sleek, and as always—happy customizing!
SmartSuite provides work platform for standardizing workflows in the following areas:
- Governance, Risk & Compliance
- IT & Service Ops
- Project / Portfolio Management
- Business Operations


