


Data Importing Techniques
Moving data between systems is never a fun activity, but in many cases, it can be a truly daunting task. With different data formats, requirements for validation, and large volumes of data you can spend hours trying to manipulate spreadsheets and just get everything formatted correctly for an import.
We recognize this challenge at SmartSuite and have been making progress in this area. We recently enhanced our data importer and added capabilities to automatically “fix” many common data formatting problems, add new fields to your application on the fly, and even do things like add additional Single and Multiple Select list values during the import.
In this blog post, we’ll explore these new import features, and then take a look at a few additional techniques you can apply in certain cases.
Importing Data Into a SmartSuite App
The data import process begins with a selection of the file type you want to use for the import. SmartSuite currently supports CSV, Excel, vCard and iCal file formats. For our purposes today we’ll focus on Excel spreadsheets, as they add a few additional options during the import process.
You’ll find the import option in the App’s dropdown menu:

A side note here - we’re in the process of enhancing ways that you can initiate imports and expanding the list of sources available. Soon, you’ll be able to create an entirely new App from an imported file, or even create entire Solutions from external systems like Airtable. Stay tuned to our Product Updates posts in the SmartSuite community - announcements are coming soon!
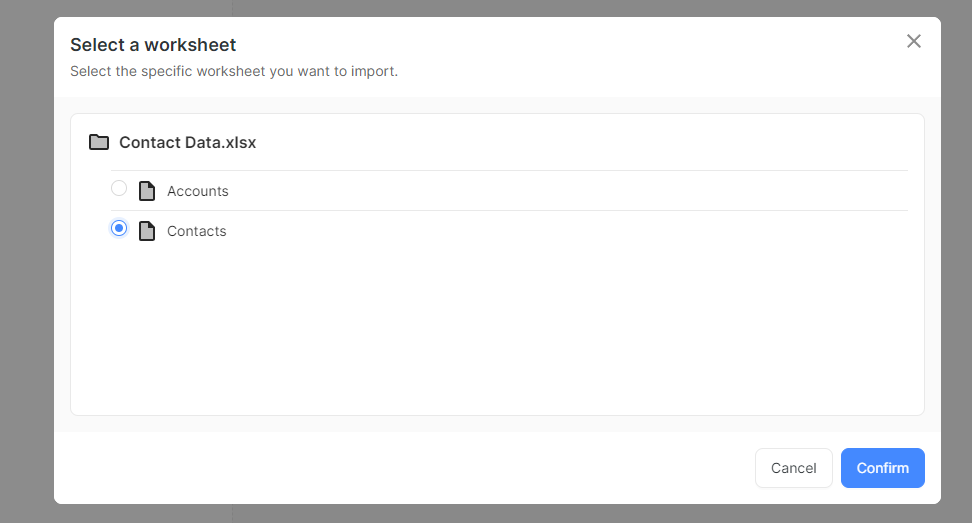
Once you have opened the importer and selected your Excel file, you’ll be able to pick which of the Spreadsheet’s worksheets you want to import (one of the reasons that I wanted to use Excel for this example, as CSV files don’t have multiple tabs). The default will be the first tab, but you can select any one from the list.
The next step allows you to select the header row. In most cases, this is the first one listed (selected by default), but this step accommodates fr the odd spreadsheet that has file information at the top, with a data section starting further down the page.

Now we’re at the good part - mapping columns to fields!
Mapping Columns
There are a number of things to keep in mind when mapping your import file columns to SmartSuite fields. First is field type - you should choose fields that are capable of storing the data you’re bringing in from external sources. Things generally fall into the following categories:
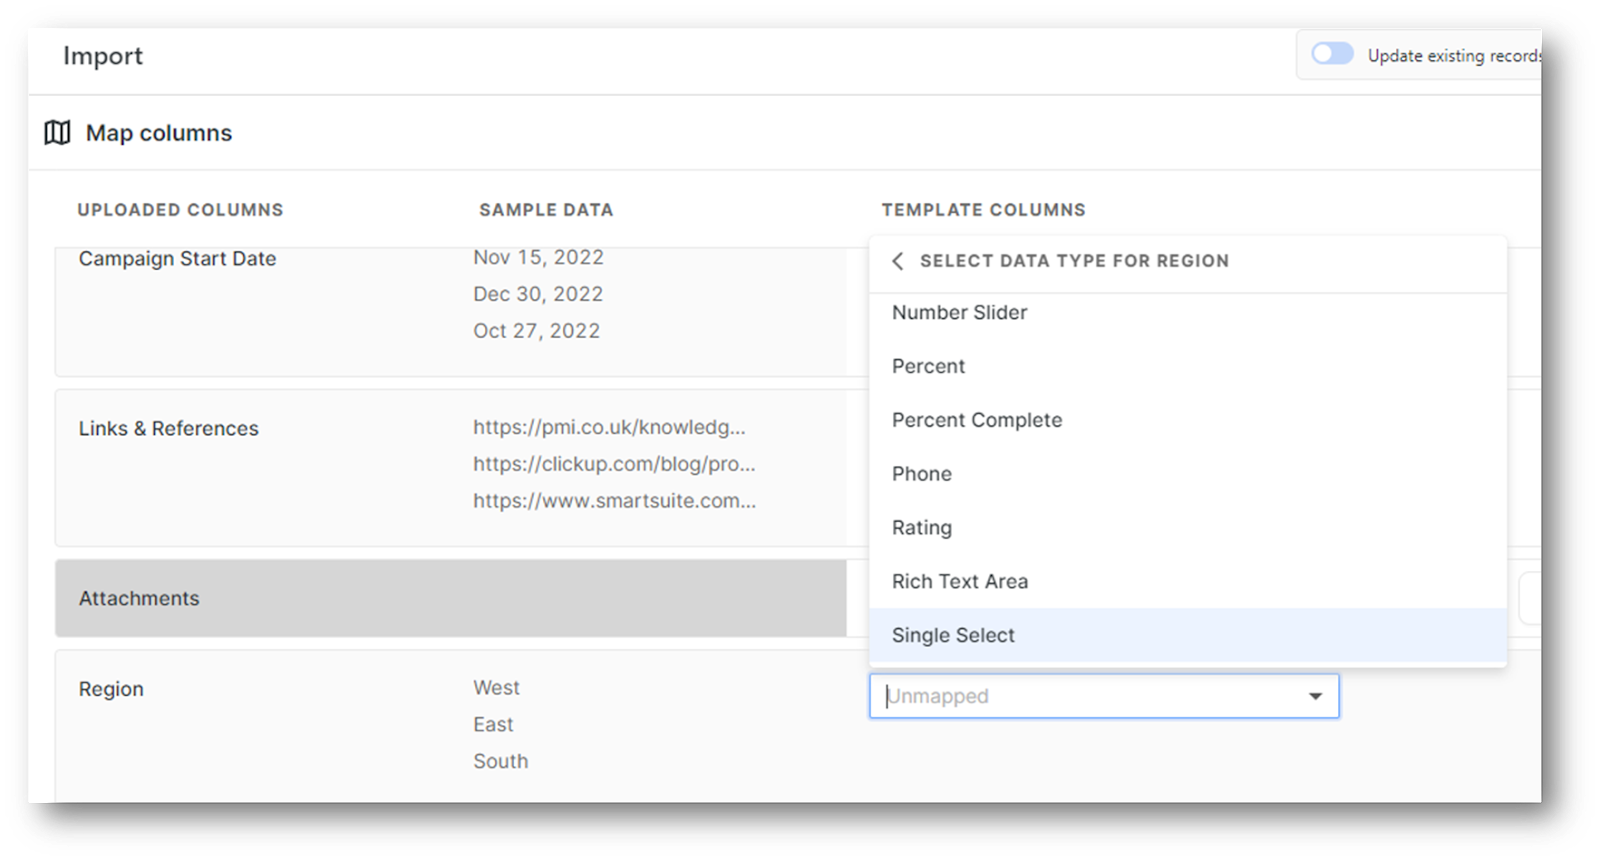
- Text. Text columns can be mapped to a variety of fields, from Text to SmartDoc to Yes / No and more. Text values can also be mapped to list types like Single and Multiple Select or Status.
- Dates. Dates should be mapped to one of the date-type fields like Date, Due Date or Date Range.
- Numbers. Numbers can be mapped to Number, Number Slider, Percent, Currency or other fields with numeric values like Rating.
The system attempts to match columns and fields by name, using both a bit of fuzzy matching along with information the importer has gathered from prior import sessions - i.e. if you always map “Due Date” to “Target Completion” the importer will start to remember that and suggest it by default.
When the importer doesn’t find a match, you’ll see a value of “Unmapped” in its selector. Click on the dropdown to select a field to map to, like this:
Another note while we’re mapping data - the importer will soon have the ability to bring in attachments via a URL link to a document. This is frequently a very labor-intensive task, and automating the import will significantly reduce the amount of time necessary to onboard images, files and all of the other documents you need.
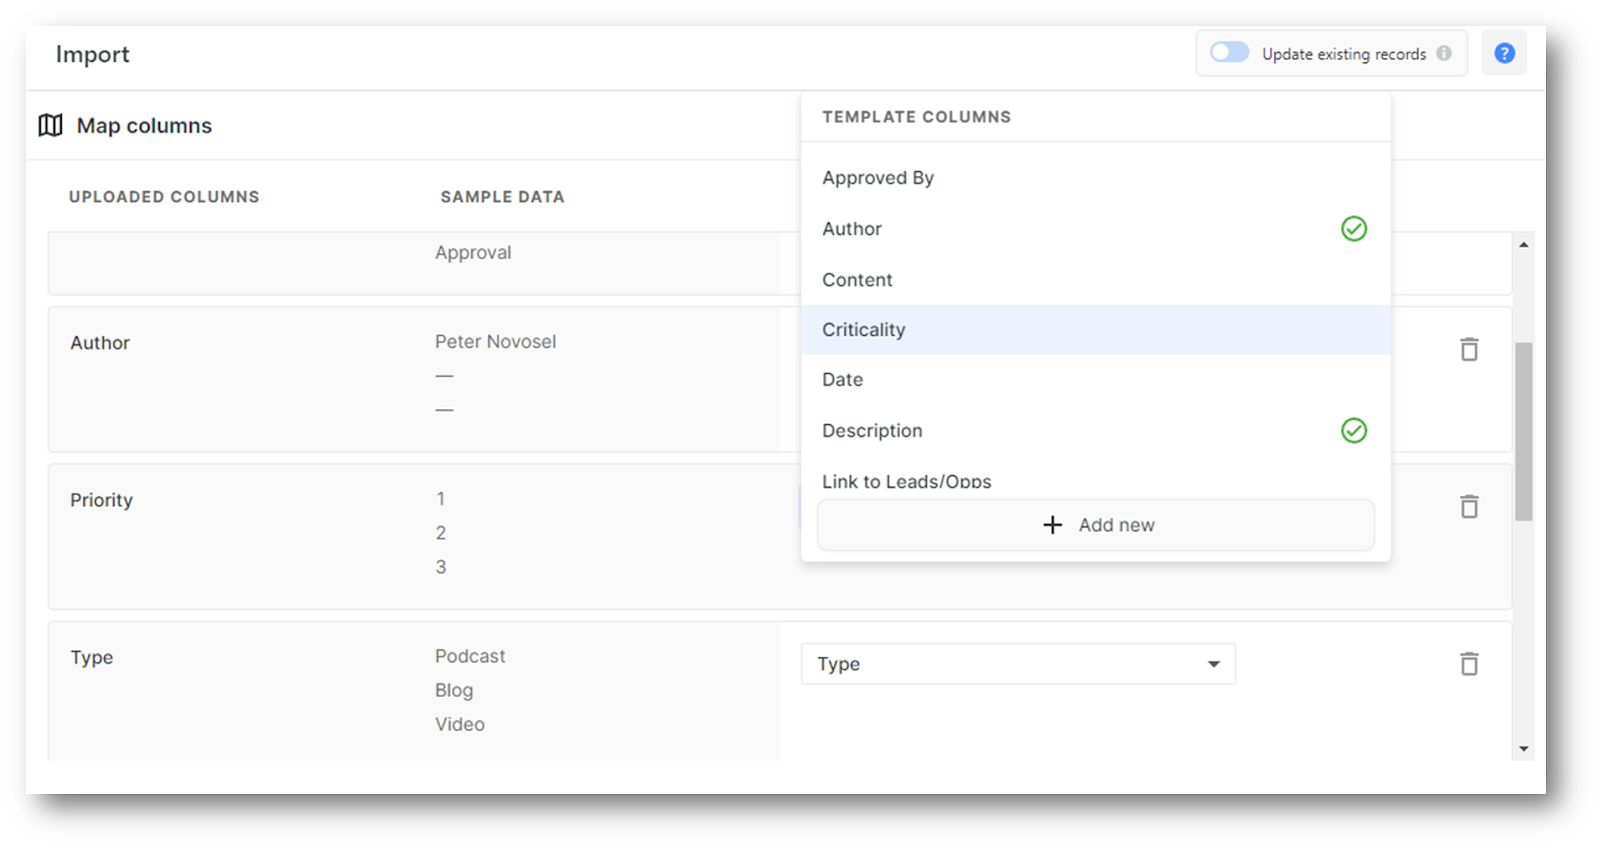
Creating New Fields
In the past, if your import file contained a field of information that you need but does not yet exist in your App, you would have to abort the import, add the field, and then restart (repeating all of your mapping configuration). Not anymore! The enhanced importer gives you the ability to add fields on the fly - you can select the field type, and the field will be added automatically to your App during the import process.
To do this, just select the last option in the field mapping list - Add New. You can then select the field type, like I’ve selected Single Select in the screenshot below:
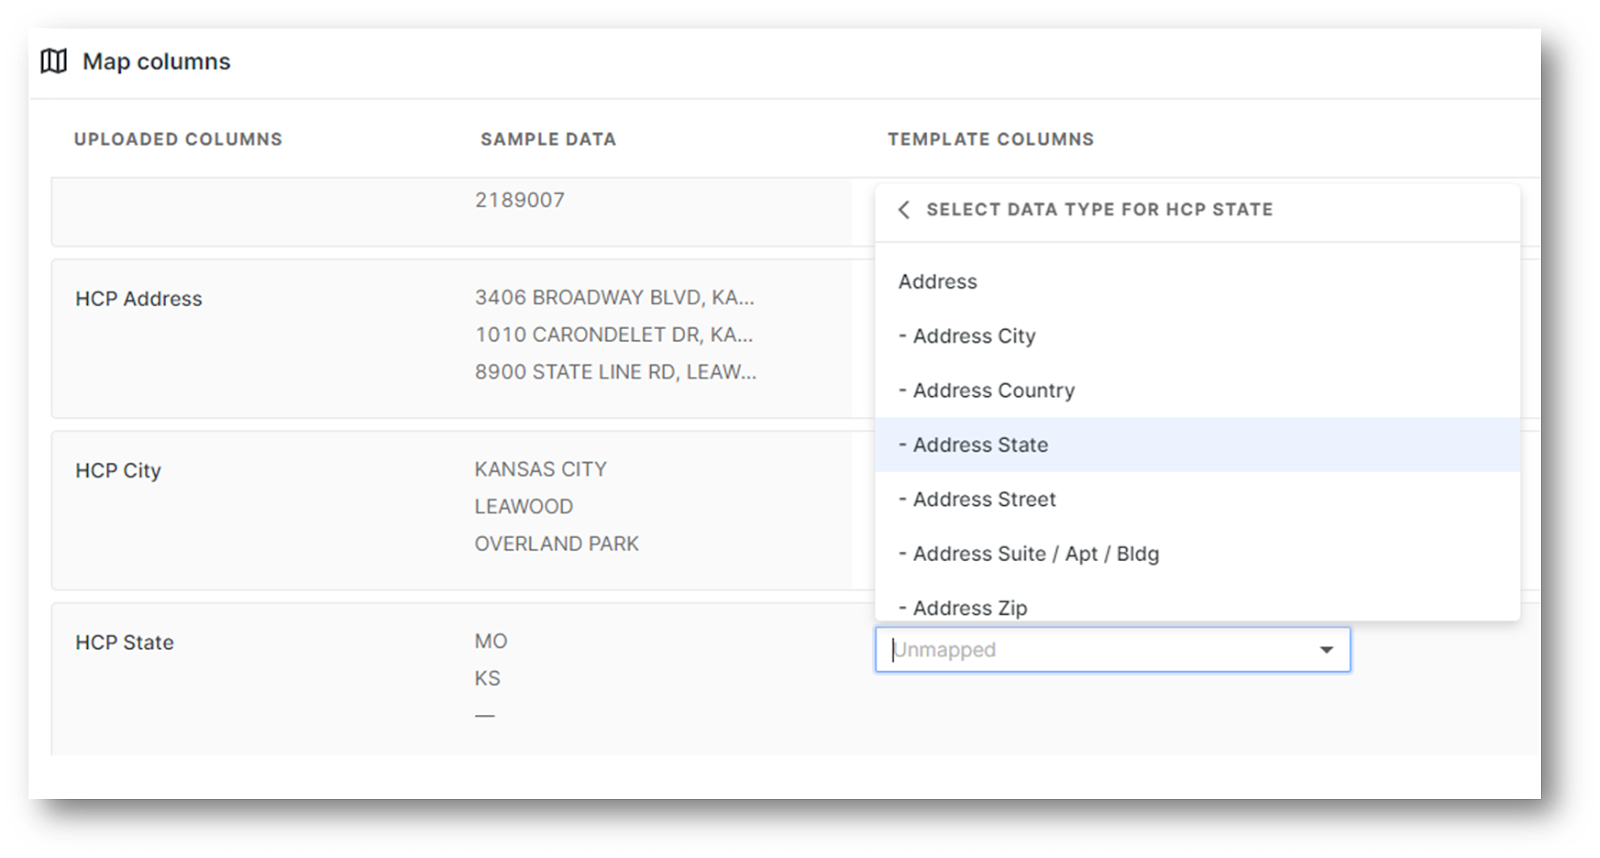
You can even import into complex, multi-element fields like an address. You can import the entire address as text, or import into the constituent parts of the address if your source data is formatted that way. You will see field types preceded by a dash - these are the “sub parts” of the field they are listed under. Select one to map the individual pieces of data into the single address field.
Review & Finalize
After the mapping is complete, the importer will check the validity of your data. If any problems were found, you will have the option to skip rows with errors, or in certain cases you will be presented with the ability to fix the errors. Here is an example of this display:
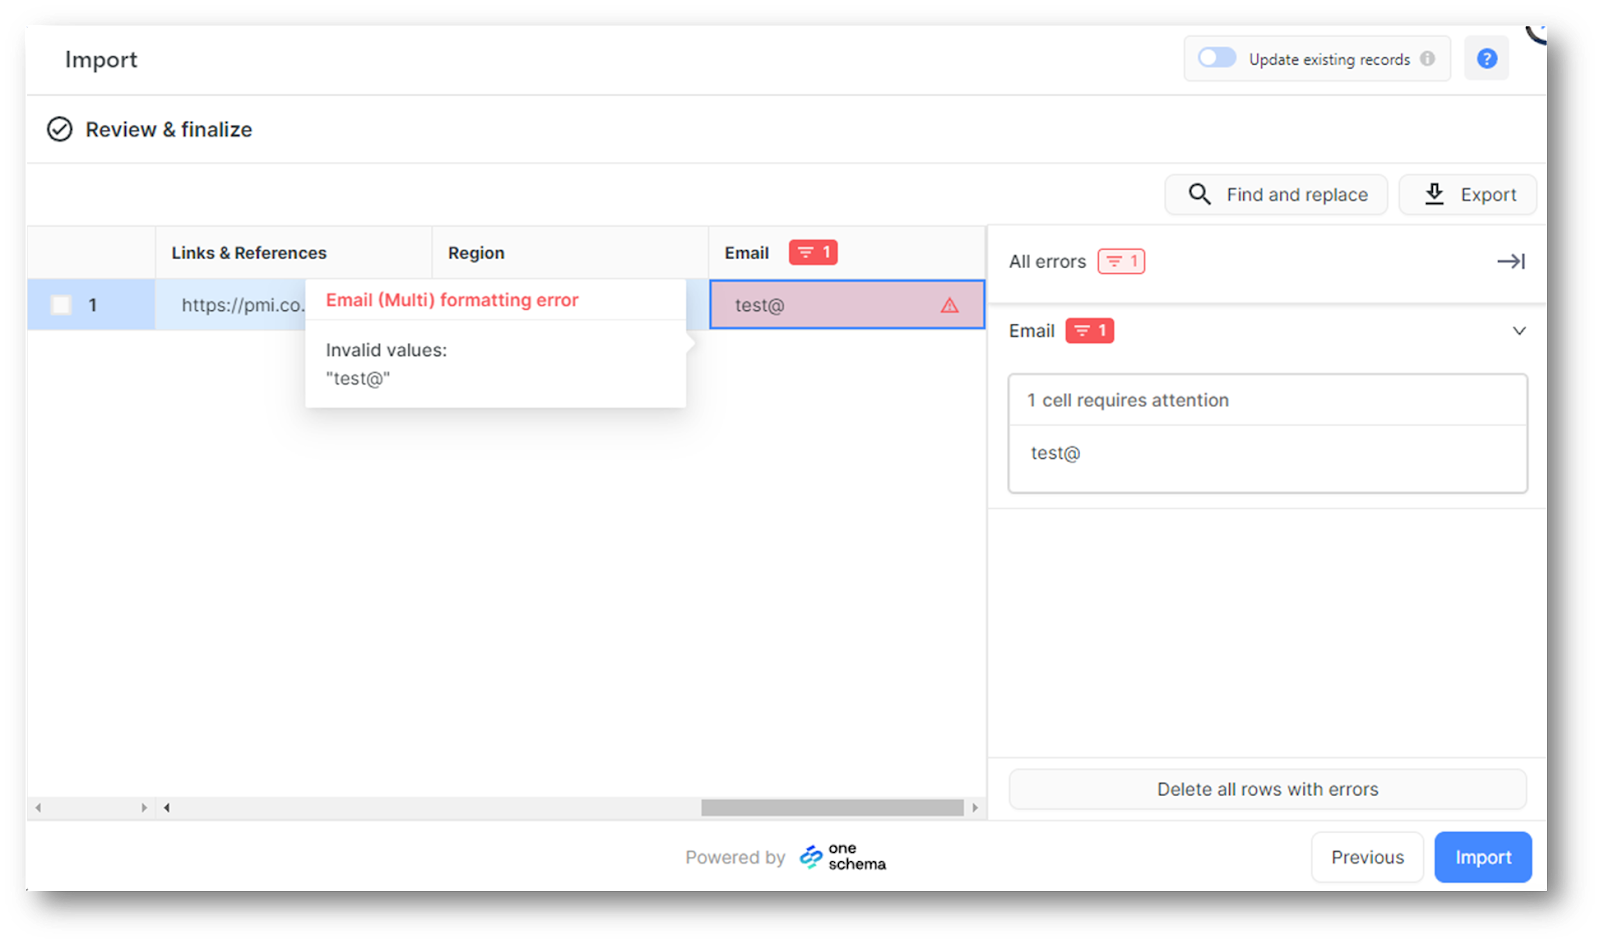
You also have the option to find and replace in the import data. Just click the Find and replace button in the interface to find and fix your data right there in the importer:

Another option is to Export the data to Excel. When you export, cells containing errors will be highlighted so that you can easily identify and fix them. Then just begin another import, using the previously exported (and fixed) data set.
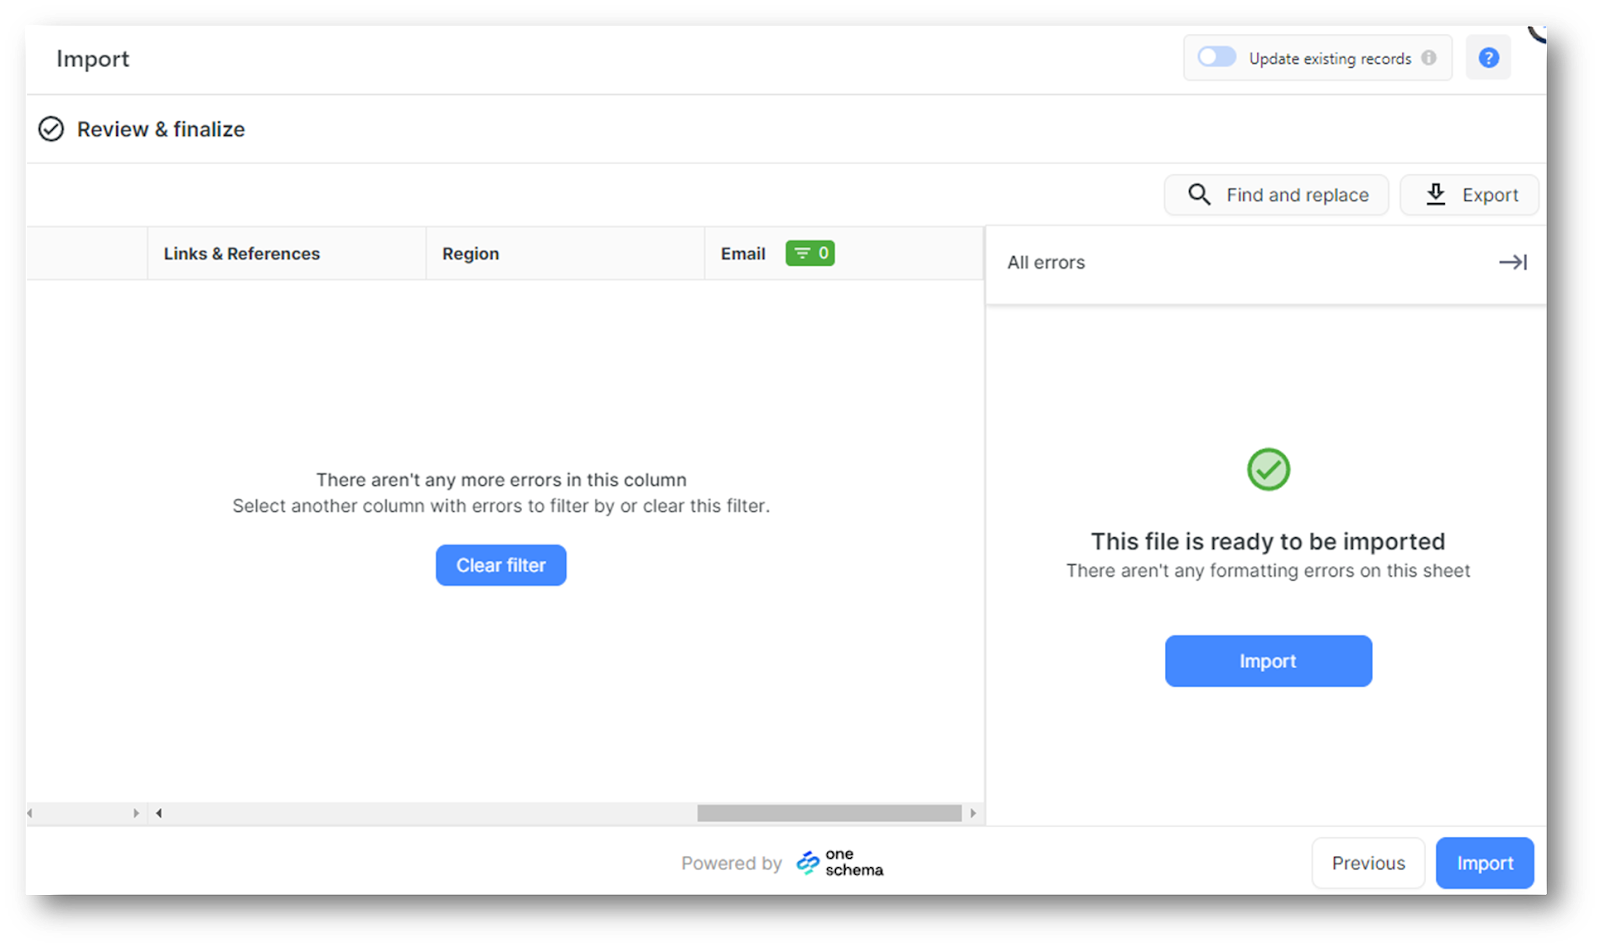
When everything has been fixed (or removed from the data set) you can start the import by clicking the blue Import button:
Updating Records
So you’ve imported your data and realized that you either forgot a few values, or used an out of date spreadsheet. No worries, you can also update records during an import. Just select the Update Existing Records option at the top, to be presented with this configuration screen:
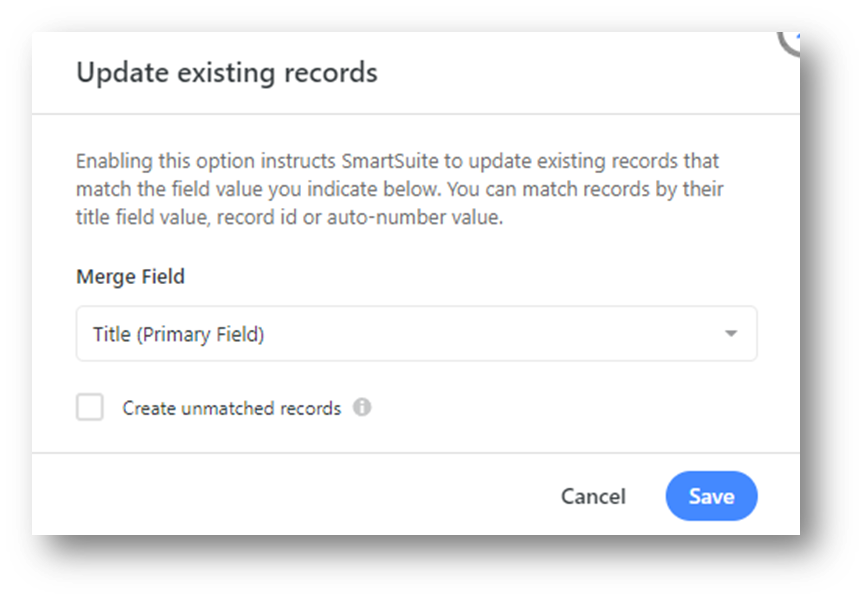
You can select the way to match records. The available options include
- Title (Primary Field). Records that match Title fields will be updated.
- Auto-Number. If your import file contains the records’ auto-number values, you can use those to match.
- Record ID. If your App contains a Record ID field, you can use the unique values contained in that field to match records.
By default, only updates will be performed. If you also want to create any unmatched records, click the Create unmatched records checkbox at the bottom of the dialog.
Pro Tips
A few tips and tricks when importing complex data:
- Import Linked Records: You can import linked records by including the value of the Title (primary) field for the linked records as values in the Linked Record field. Multiple values should be separated by commas.
- Import Non-Dependent Data First: When you import data with Linked Records, start with data that lacks dependencies, then add data in dependent Apps.
- Format date information as Dates: In Excel, you can select a column and set its data type. If you select “date” type for dates, you’ll have a better chance of avoiding formatting issues during import.

SmartSuite provides work platform for standardizing workflows in the following areas:
- Governance, Risk & Compliance
- IT & Service Ops
- Project / Portfolio Management
- Business Operations


