


Relating Expenses to Projects
Welcome to another entry in our SmartTips series! I'm Jeff Gonzalez, and in today’s post, we’ll be diving into a simple yet potent project management solution. Specifically, we’ll explore how to seamlessly integrate expense submissions with project details to enhance financial transparency and control. This step-by-step guide will not only simplify the process but will also make it engaging. So, let's get started!
Understanding the Basics
Before we dive into the mechanics, it's essential to comprehend why aligning expenses with project details is pivotal. In project management, tracking every dollar spent against the project budget is crucial for maintaining financial health and ensuring project success. This requires a systematic approach where every expense submitted is directly linked to the project it pertains to.
To facilitate this, we have set up a basic structure in our project management toolkit. This includes tables for projects, tasks, milestones, and deliverables. What’s new here is the inclusion of an expense table, designed to capture and relate expenses directly to specific projects.
Setting Up Your Project Expense Table
Configuring the Basics
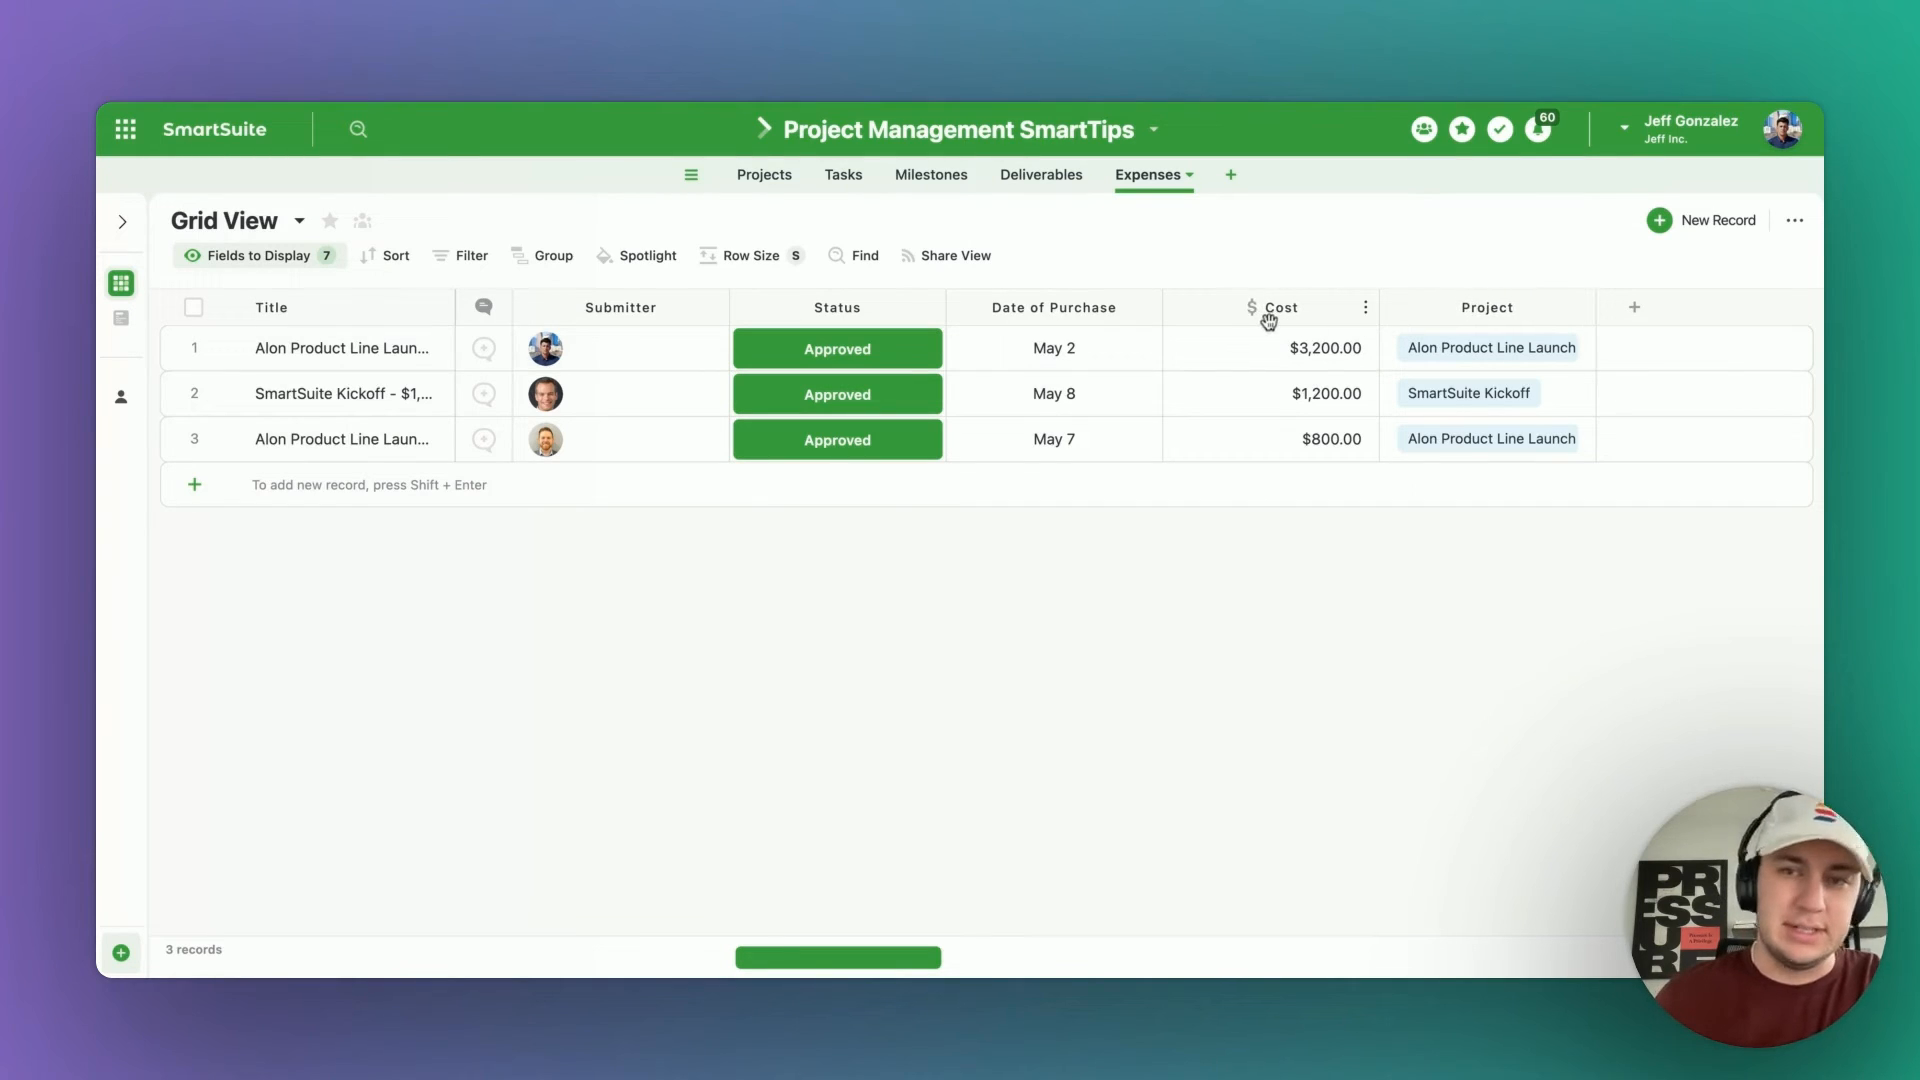
The first step in our setup is the expense table. Here’s what it typically consists of:
- Assigned To: Who submitted the expense?
- Status: Is the expense requested, approved, or denied?
- Date of Purchase: When was the item/service purchased?
- Cost: How much did it cost?
- Project: Which project is this expense associated with?
This structure not only helps in organizing the expenses better but also ensures that every penny spent is accounted for in the context of its respective project.
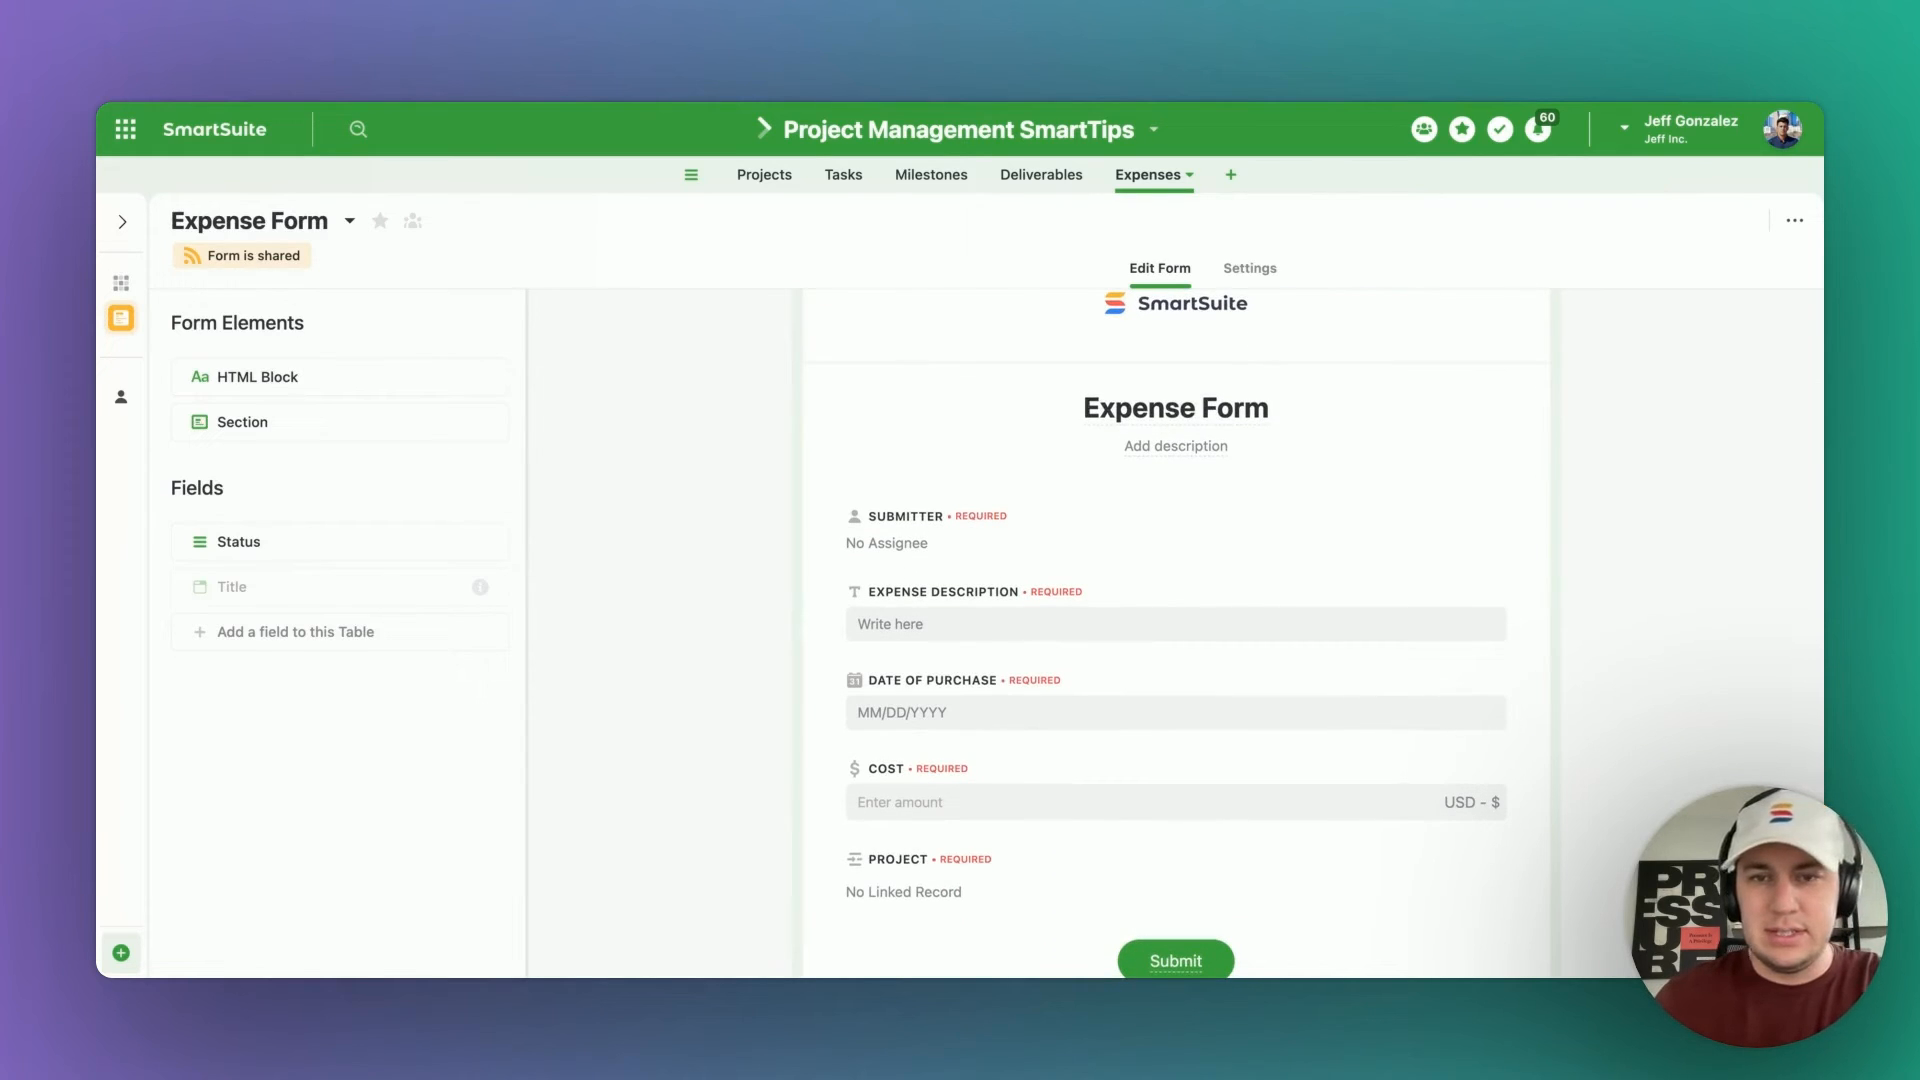
Enhancing Usability with Forms
To make the submission process as frictionless as possible, we employ a form view. This view allows expenses to be titled and documented with ease, and even lets you add a logo for a personalized touch.
This simplifies the data entry process, ensuring that details are captured accurately and consistently.
Integrating Into Dashboard
The real magic happens when we integrate these forms into a SmartSuite dashboard. This dashboard acts as a central hub where expenses can be submitted and viewed alongside project financials.
To integrate, we use a custom code widget that allows embedding HTML directly into our dashboard.
This setup not only centralizes the information but also enhances accessibility, empowering team members to track financial details efficiently.
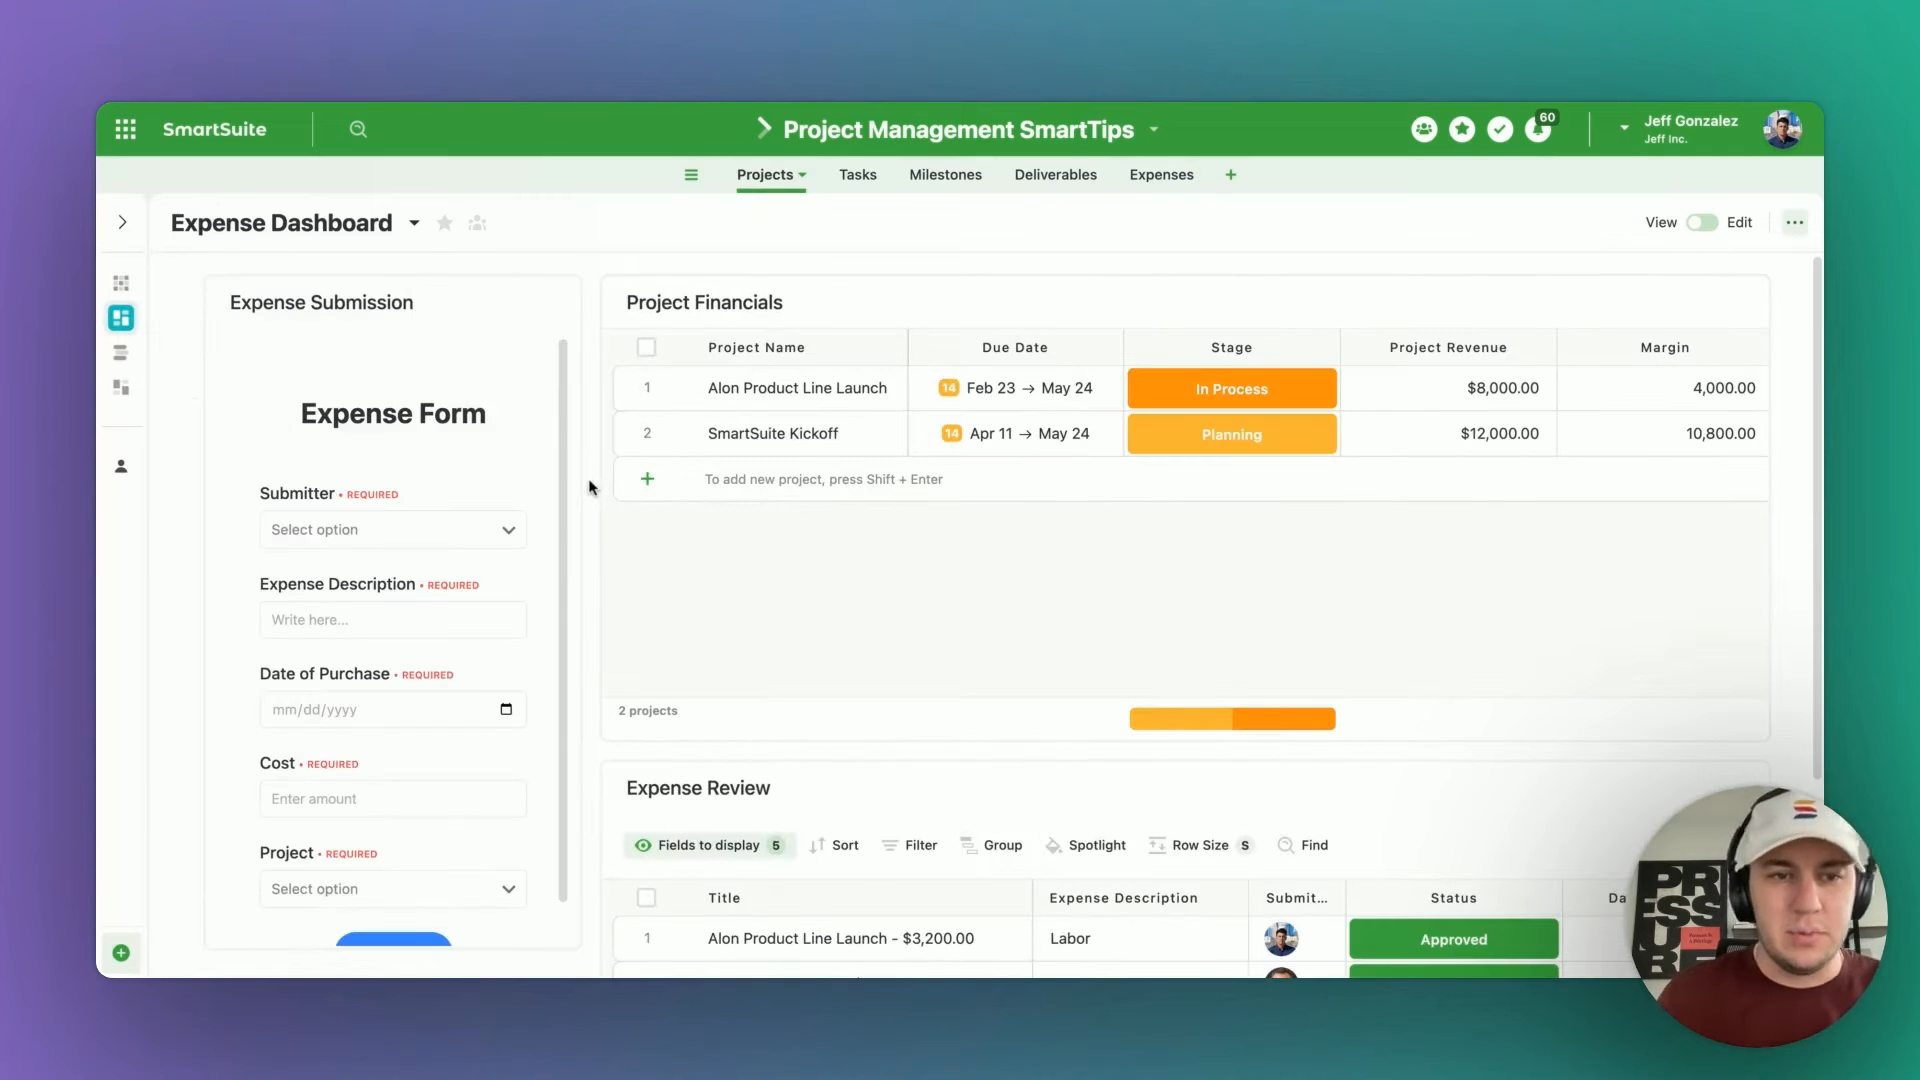
Financial Oversight with Grid Views
One of the dashboard views we employ is a simplified grid view that displays key financial metrics:
- Project Revenue: Total revenue from the project.
- Expenses: Sum of all approved expenses related to the project.
- Margin: Calculated as
Project Revenue - Expenses.
By subtracting the total approved expenses from the project revenue, we keep a real-time tab on the project's financial performance, ensuring that we stay within budget and react promptly to any discrepancies.
Tracking Expenses: A Practical Example
Imagine spending on the most expensive lunch in business history. Here’s how you would go about submitting it:
- Enter Your Name: Jeff Gonzalez.
- Description of Expense: Business lunch.
- Date of Purchase: Enter yesterday's date.
- Cost: Let's hypothetically say $1,000.
- Project: Tied to "SmartSuite Kickoff".
Once submitted, this expense doesn't immediately affect the project margin in our grid view—until approved.
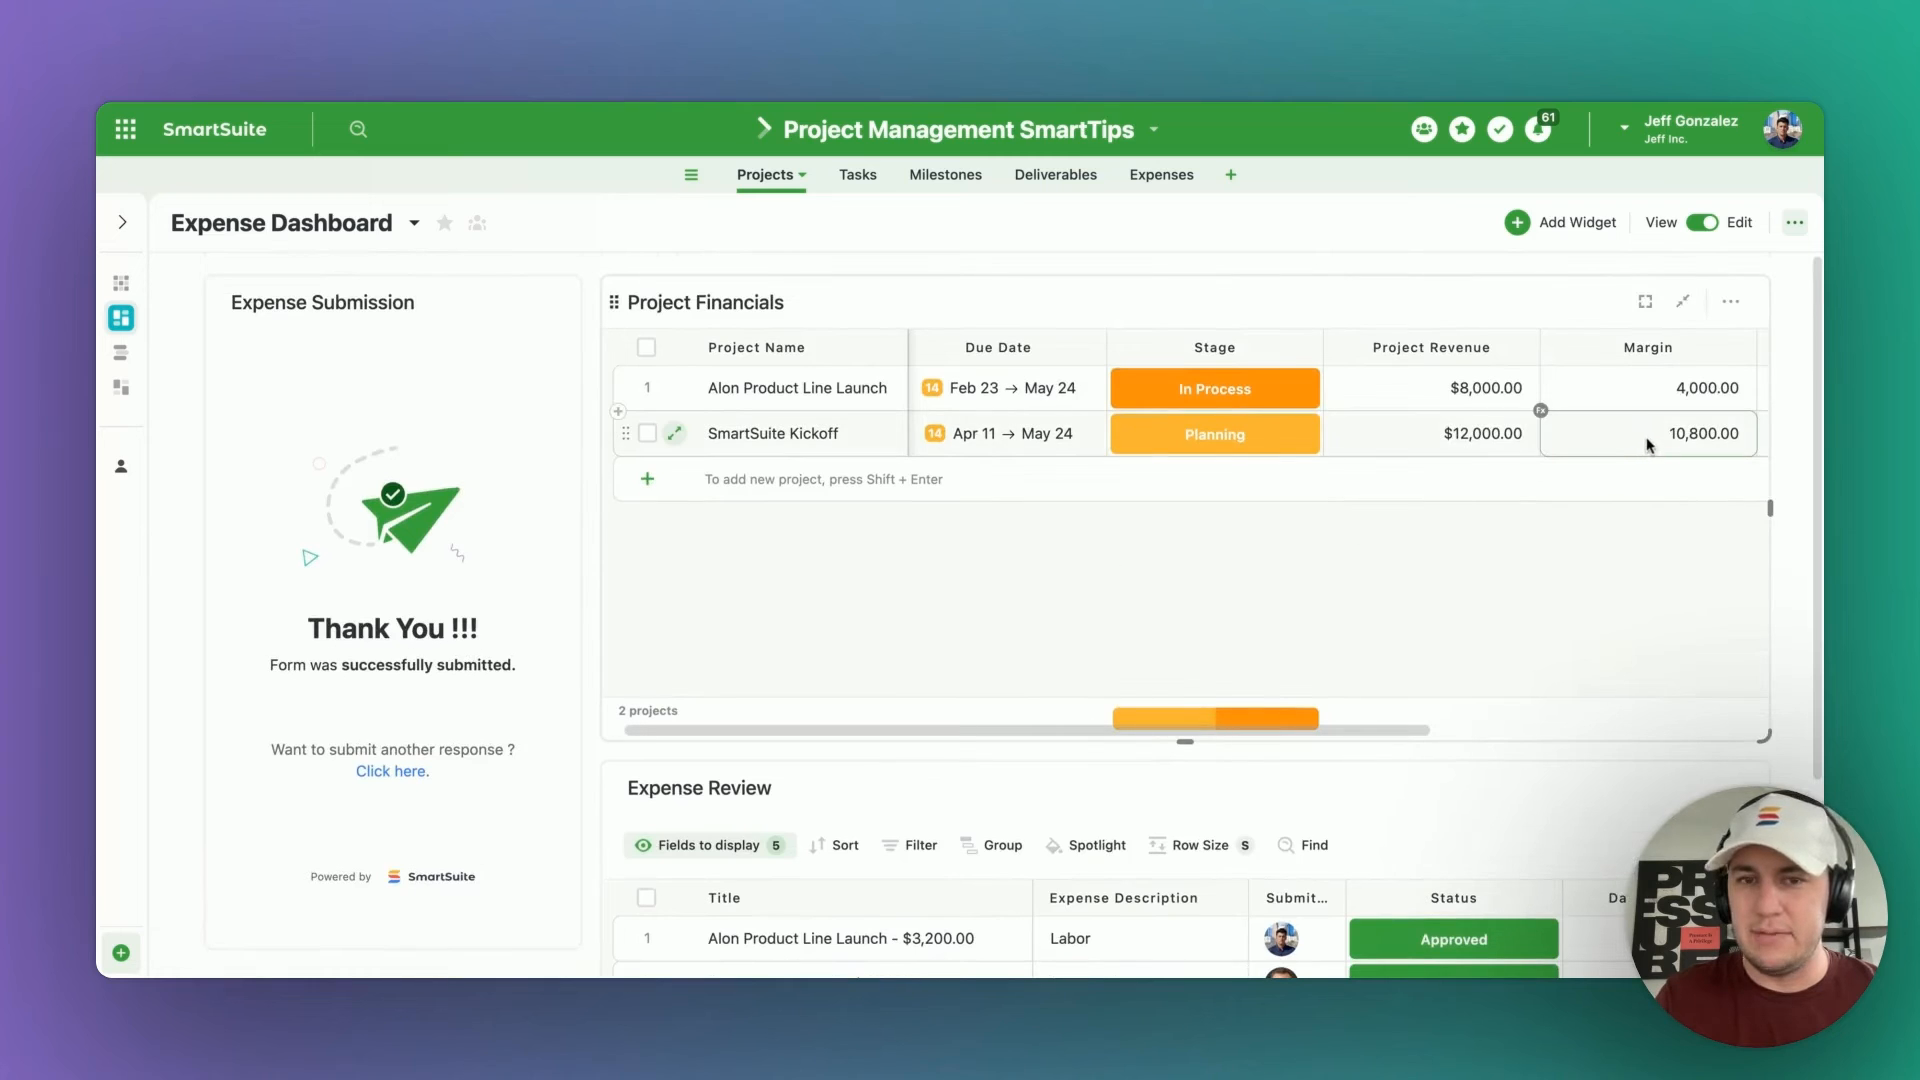
Adjusting Status for Approval
Post submission, the expense will initially reflect as requested. Our grid allows sorting and filtering to manage and review these expenses effectively.
To approve an expense:
- Filter for the requested status.
- Change status to ‘Approved’.
- Watch as the grid dynamically updates the project’s financial standing.
In this example, adjusting the status immediately reflects; the project’s margin decreases by the exact cost of the lunch, showcasing an updated margin of $10,800 from an initial $12,000, thus maintaining a clear, transparent view of financial standings.
Conclusion & Future Explorations
This guide hopefully sheds light on the streamlined, effective way to manage project expenses. By integrating expense tracking directly within the project management dashboard, we ensure that every dollar spent is visible, accounted for, and properly managed.
SmartSuite provides work platform for standardizing workflows in the following areas:
- Governance, Risk & Compliance
- IT & Service Ops
- Project / Portfolio Management
- Business Operations


