


Today, we're diving into how to take your traditional physical order forms and transform them into a streamlined digital work management system using SmartSuite. Imagine turning your pen-and-paper forms into a purpose-built software solution designed by you, sans any coding.
Why Digitizing Work Orders Matters
1. Physical Work Orders Are Prone to Errors
Physical work orders might feel convenient, but they're a challenge when it comes to retrieving information. Handwriting issues, spills, and lost documents are all too common. This can lead to team confusion, missed orders, and numerous mistakes. Digitizing your work orders significantly reduces these risks by keeping everything organized and easily accessible.
2. Overcomplicating Digital Solutions
While turning to digital solutions, many businesses overcomplicate the process by choosing industry-specific, rigid software that is often expensive and doesn’t always fit their workflow. This not only adds unnecessary costs but also eliminates the potential for a competitive advantage. Our approach focuses on creating a unique, cost-effective work order management system tailored to your business needs using SmartSuite.
Getting Started with SmartSuite
Let's dive into the process of building your work order ticketing system using SmartSuite. For our example, we’ll pretend we’re running a property management company that serves landlords. We’ll be organizing work orders in SmartSuite, which is currently being tracked on paper.
Part 1: Replace Offline Work Orders with SmartSuite
Step 1: Setting Up the Space
Begin by opening your no-code, easy-to-use work management software—SmartSuite. If you don’t already have SmartSuite, you can load a template specific to your industry and follow along. In our demo, we've set up a property management solution using a template.
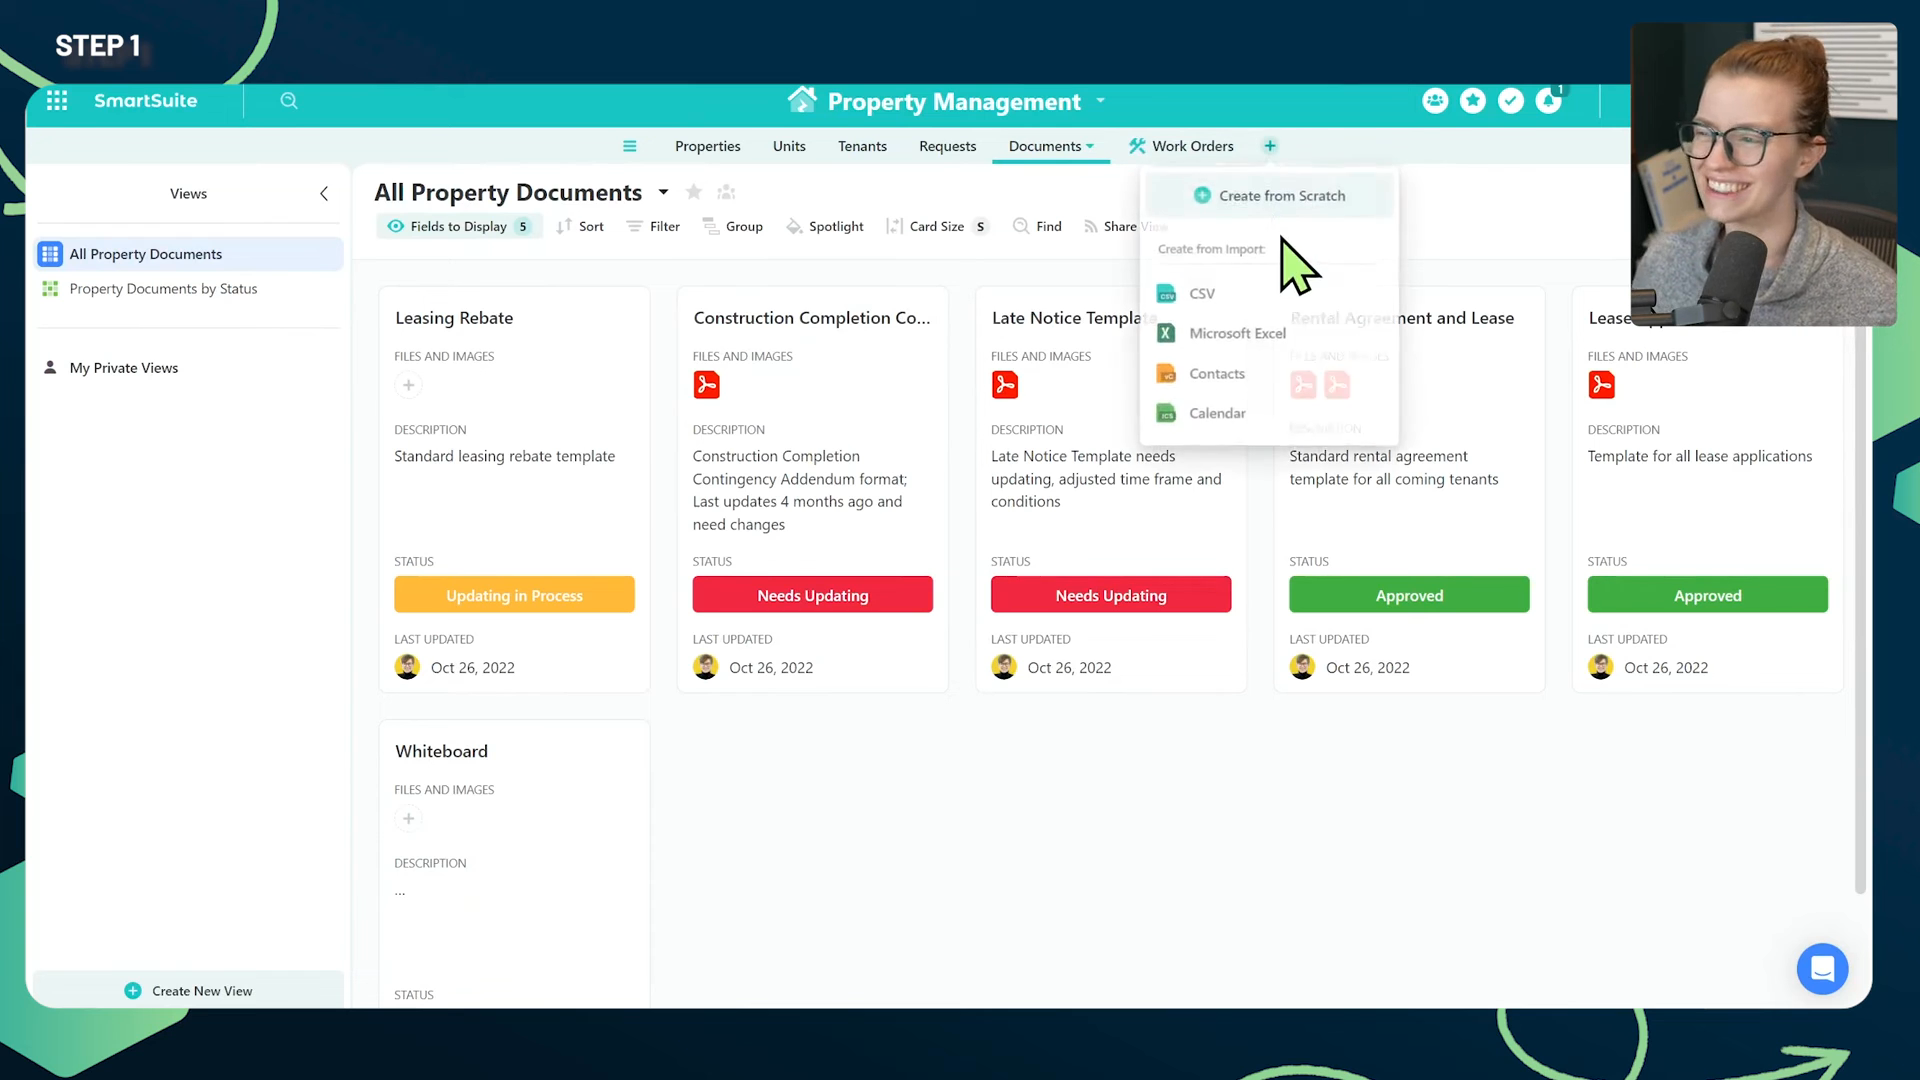
1. Click the plus button to start from scratch.
2. Name your new table "Work Orders."
3. Optionally, add an icon for visual appeal.
Step 2: Analyze Your Existing Forms
Next, take your existing form and identify which parts need to be digitized and which can be discarded. For this example, we'll use a template picked from a Google search result. Evaluate it and determine what fields are essential and what can be eliminated.
1. Cross out any redundant fields.
2. Circle fields that are already in SmartSuite.
3. Identify new fields you need to create.

Step 3: Create Fields in SmartSuite
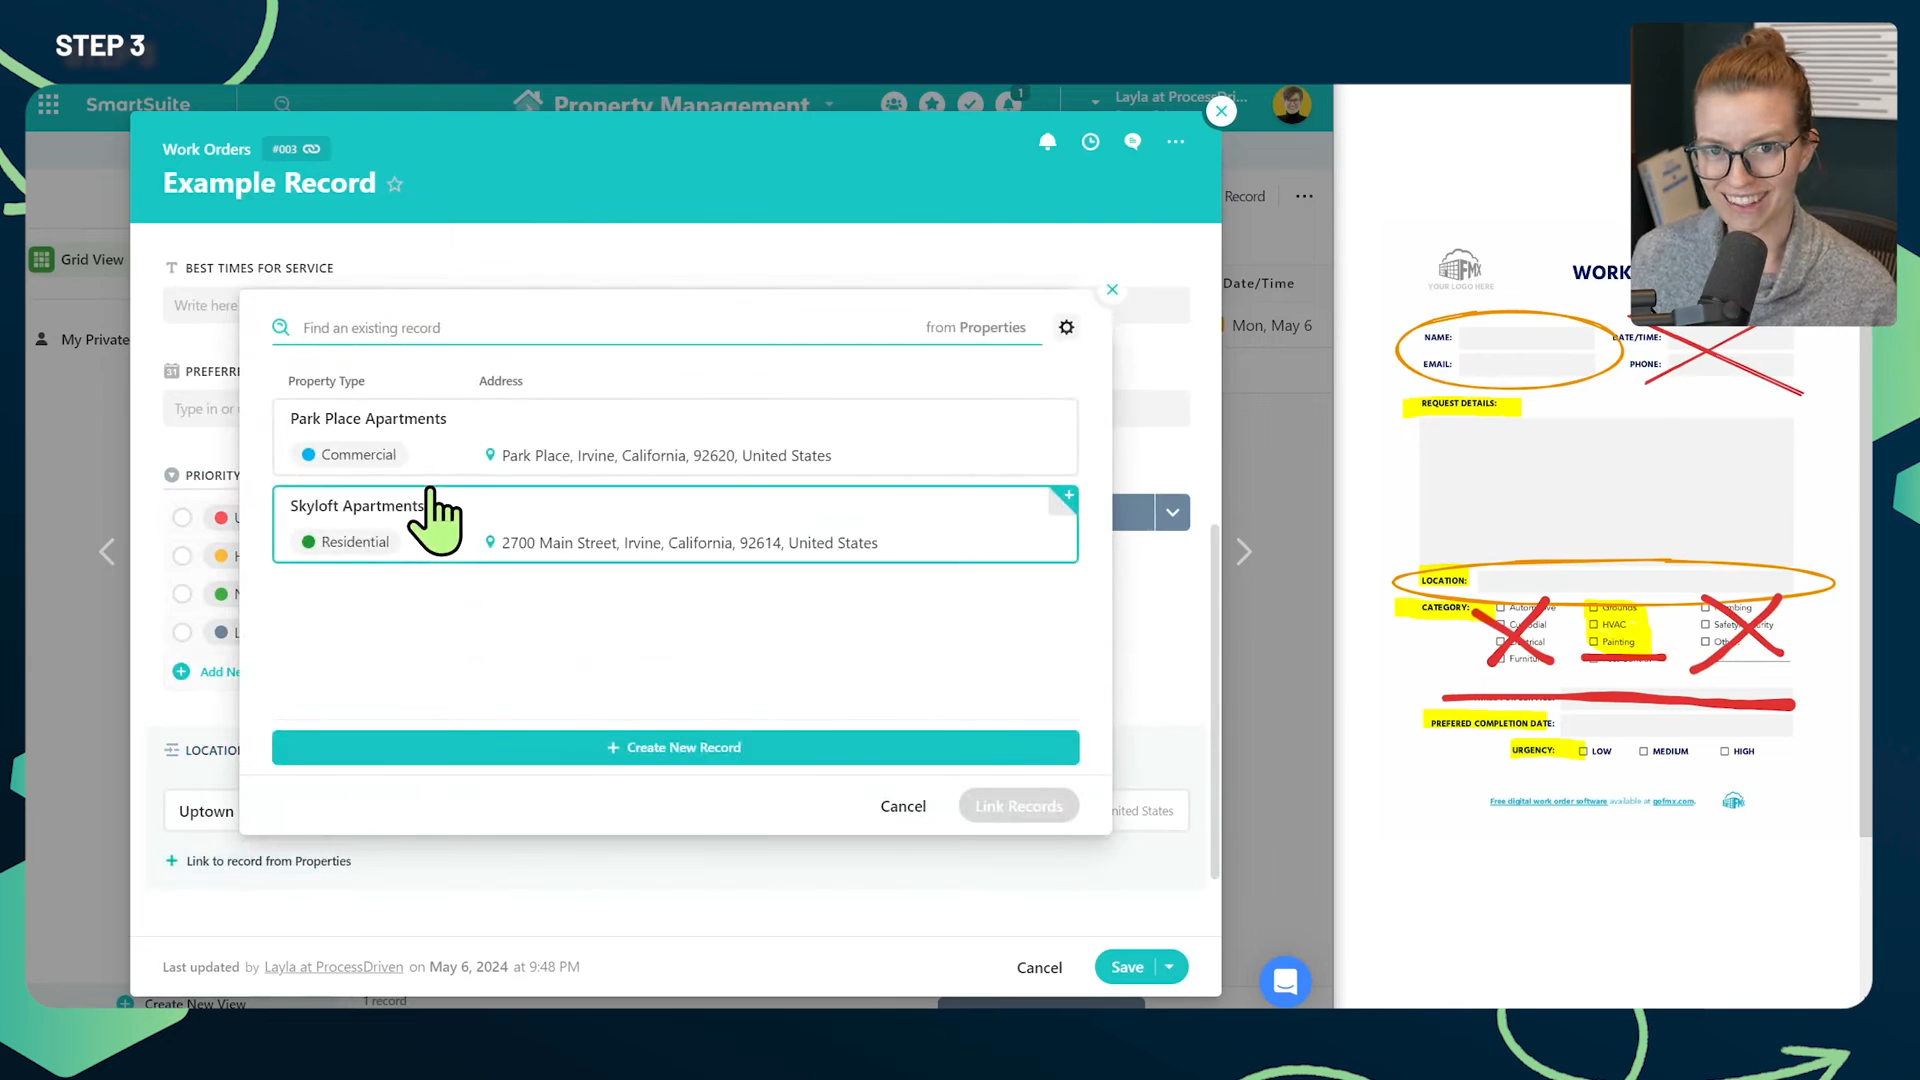
Start by creating the fields that aren’t marked for exclusion. This includes fields like request details, category, preferred completion date, and urgency. You can then move on to creating more complex fields, such as linked records, for elements like name and location.
**Example Fields:**- Request Name- Date and Time- Request Details- Category- Priority
Use SmartSuite's “linked record” feature to avoid retyping information frequently. For instance, link the "Name" field to your tenant directory to pull details automatically.
Importing and Adding Data
Now that your digital system is set up, the next step is to add your existing information:
Phase 1: Import Existing Data
You have two options:
1. Import all work orders you've ever done.
2. Pick a starting date and begin digitizing work orders from that point onward.
Phase 2: Getting Users Onboard
Ensure all relevant team members are added to SmartSuite. This includes admins or office workers with access to a computer or tablet, and field technicians using SmartSuite’s mobile app.
Using Softr to Streamline Processes
To overcome app fatigue in your organization, consider using Softr—a no-code app builder. This will allow you to create a cohesive system that integrates all necessary tools and processes in one place.
Softr Overview
Softr lets you build custom apps that integrate with various tools like SmartSuite and Stripe. Here's how you can leverage Softr to your advantage:
**Potential Uses:**- For Field Technicians: View and manage work requests assigned to them.- For Internal Teams: Integrate policies, time off requests, and clock in/out trackers.- For Customers: Submit, view, and manage their work requests.- For Billing: Allow customers to update their billing information.
Create pages that cater to different user groups—office workers, field workers, customers, and potential customers. Each group will have specific permissions tailored to their needs.
Step-by-Step Building in Softr
Let's walk through creating your app in Softr:
- Log in to Softr using your account.
- Create a new app from scratch or use AI to generate one.
- Define your user groups and permissions.
Setting Up Pages for Different User Groups
Create customized pages that cater to each user group's needs. Ensure these pages pull real-time information from SmartSuite.
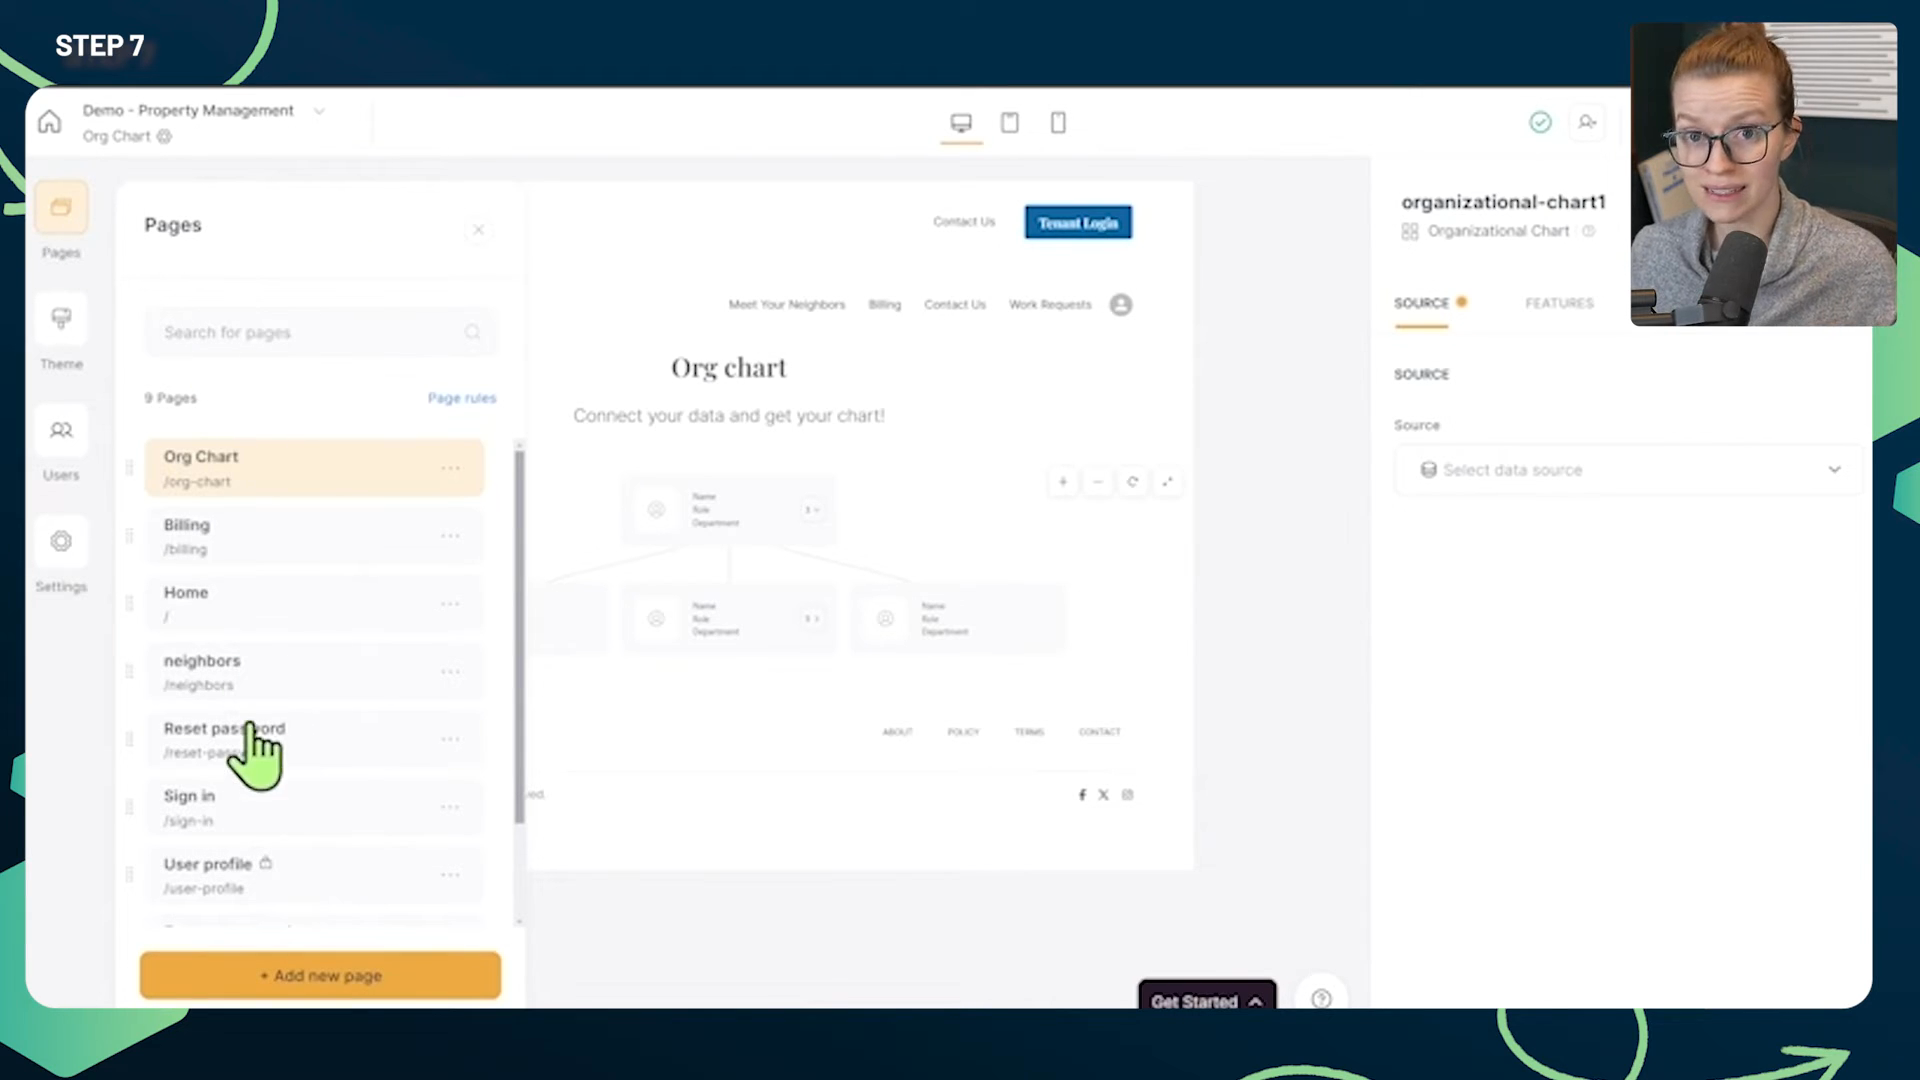
Examples:

Field Technicians: A page showing their work orders and allowing updates.
Internal Teams: A central hub for all company-related tasks and policies.
Customers: A portal to view and manage their orders and billing information
Public Page: Showcase your services and allow potential customers to contact you.
Each page and user group setup will ensure a seamless experience and reduce the need for multiple applications.
Conclusion: Bringing It All Together
By following these steps, you've successfully digitized your work order management and integrated various processes into a single, efficient system using SmartSuite and Softr. This setup not only eliminates the inconsistency and inconvenience of physical forms but also empowers your team and customers with a modern, dynamic tool tailored to your business needs.
To experience the future of work management firsthand, start your free SmartSuite trial today!


.jpg)


