


Picture this: You're at a crossroads in your workflow, and you face a decision that could take you down multiple paths. It's where efficiency can take a hit, or you can leverage the dynamic power of automation to accelerate your productivity. This is what we call a "fork" in your workflow, and it's about to get a lot simpler.
Building Your Automation with SmartSuite
Let's dive into my SmartSuite account where we have a straightforward solution named Pipeline connected to a single 'Leads' table. The goal here? To gather information via a form – name, email, the date of record creation, and a couple of critical questions that will inform our next steps based on the responses we receive.
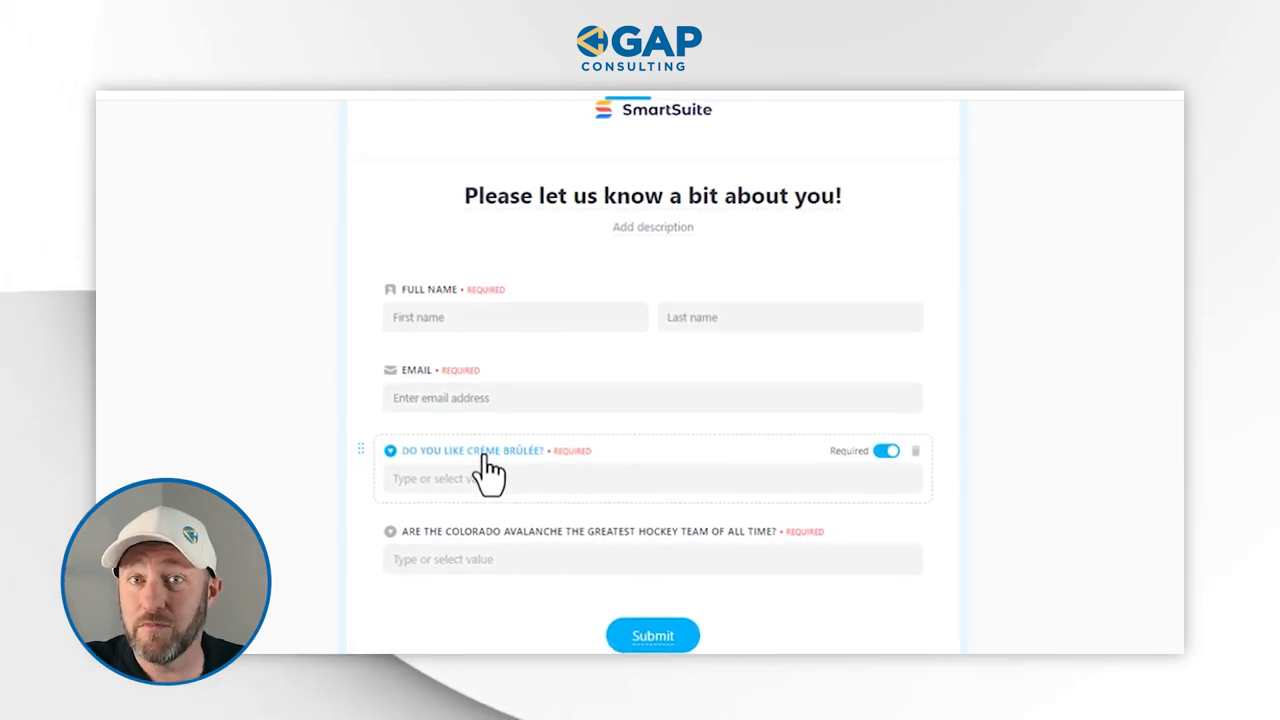
Here's what the form looks like: it's straightforward with a full name field, an email field, and auto-captured data of the form's submission date. Then come the all-important questions that will influence our decision-making - whether to approve, deny, or seek more details. We've opted for a semi-automatic process where the response warrants our review instead of an immediate, blanket automated action.
Crafting the Fork in Your Workflow
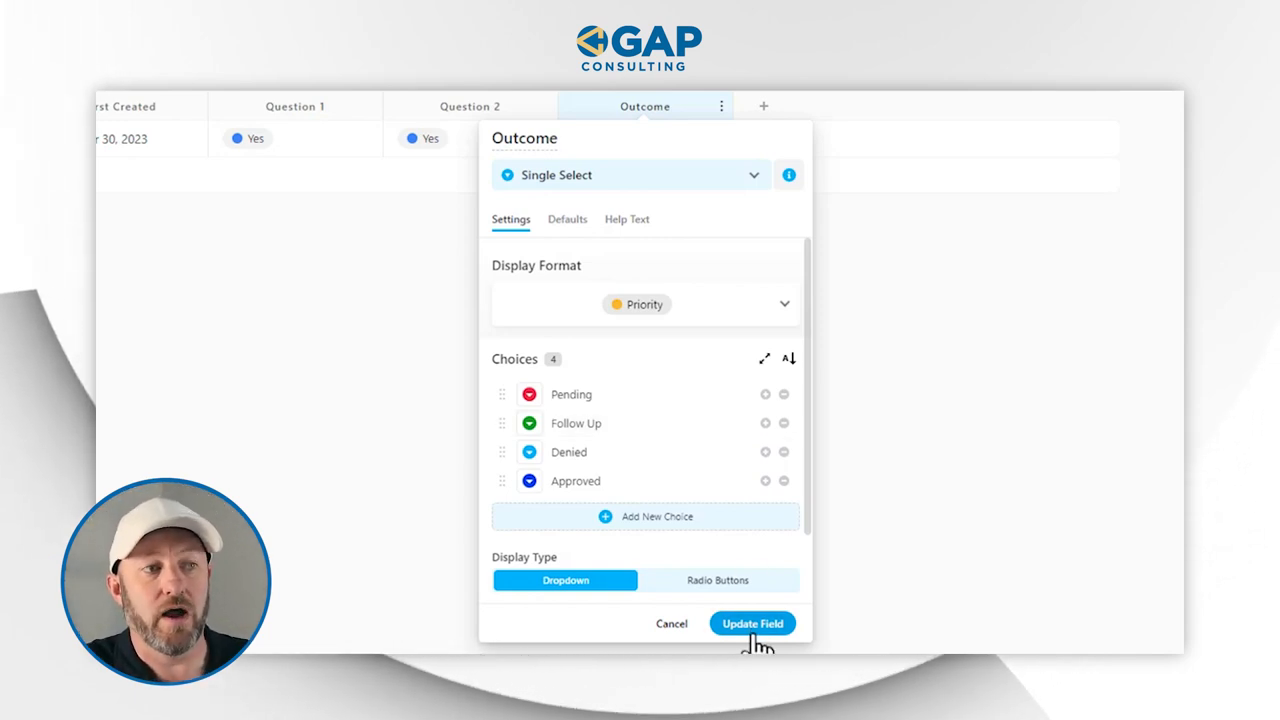
Imagine submitting the form as a respondent. On the database's end, a new record springs to life, its fate initially set to 'pending' while awaiting our verdict. It's time to build the fork in the road - depending on our choice, the lead could be followed up on manually, receive a courteous denial, or be approved with instructions for the next steps.
Automating Responses Based on Outcome
Here's where SmartSuite’s automations shine. We can create tailored responses triggered by the outcome field.
- Start by setting up record matching conditions in the Leads app
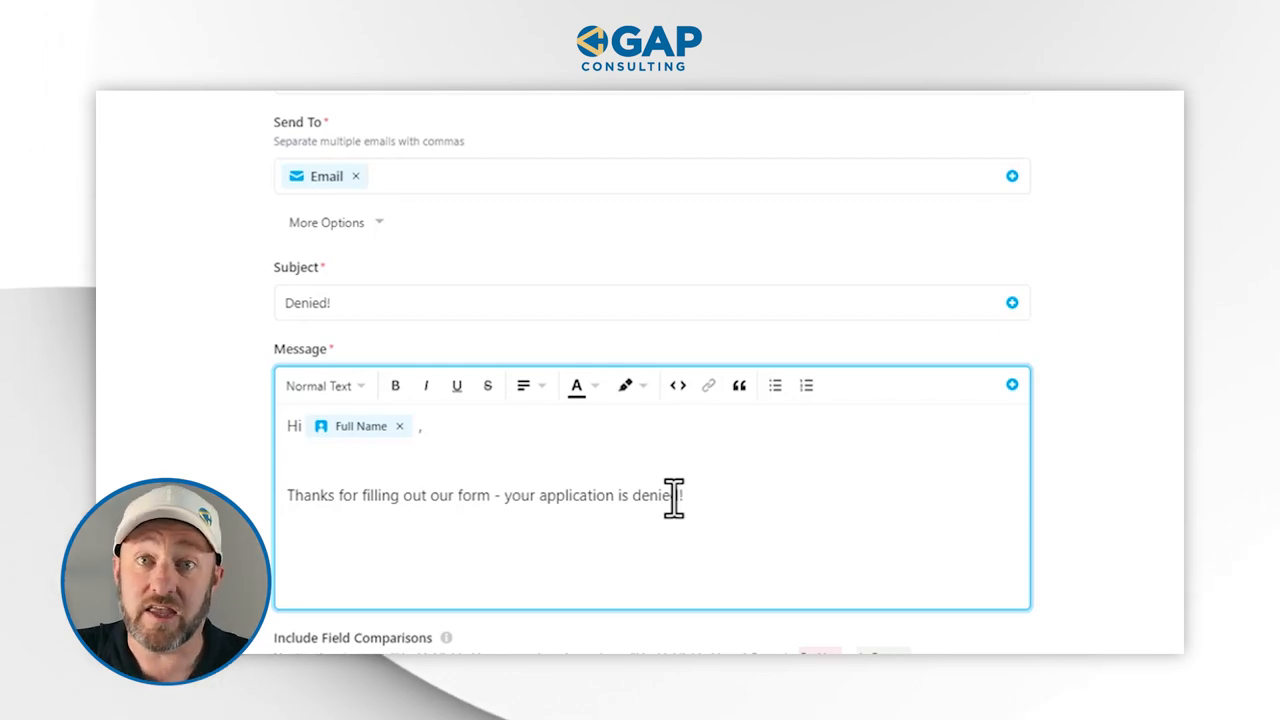
- Look for outcomes matching 'approved,' and ensure the email address exists to avoid a broken series of events
- Once the trigger is happy, craft an action step - connect to Gmail (or your preferred email service) to compose and send personalized responses

Remember, a precise setup matters, so our automated responses hit the mark without a hitch.
Advanced Trigger Tips and Automation Setup
To avoid multiple trigger events or flip-flopping decisions, remember to add a 'yes/no' field in your form to mark whether the outcome action has already been performed. This ensures that each automation only fires once, safeguarding against confusion and maintaining clarity in your workflow.
You can tell we've breezed through the creation of workflow forks and the automation intricacies. The world of no-code tools might seem vast, but SmartSuite makes it intuitive and, dare we say, enjoyable to navigate.
Eager to put these tips to the test? Ready to make your workflow breezier than a beach vacation? Head over to SmartSuite and start your free trial. And remember, if you're enjoying these guides, be sure to subscribe so you'll never miss a beat.


.jpg)


